
Simple Steps for Healthy Composting
Ever wondered why your compost bin sometimes turns into a smelly mess or just sits there, doing nothing?
You’re not alone—finding the right balance between nitrogen and carbon is the secret sauce for homemade compost bins to thrive.
Composting is simply letting nature break down your kitchen scraps, garden clippings, and even household paper, turning them into dark, crumbly compost that feeds your soil and helps the planet.
Balancing nitrogen (often called “greens” like veggies and grass) and carbon (“browns” like dry leaves and cardboard) isn’t hard, but it makes all the difference.
Get it right and you’ll have compost that smells fresh, stays crumbly, and works fast—whether you use a pile, compost tumbler, or even vermicomposting with worms.
Making compost at home also means less waste going to landfill and more healthy gardens, which is good for anyone wanting to recycle and live sustainably.
If you’re just starting out or want to fine-tune your process, this guide will show you exactly how to balance nitrogen and carbon in homemade compost bins, with tips for every composting style.
Ready to turn your waste into garden gold? Let’s make composting easy—and maybe even a little fun.
For even more ideas, check out these Benefits of Home Composting.
Understanding Composting: Nitrogen and Carbon Essentials
Understanding how to balance nitrogen and carbon in homemade compost bins starts with knowing what composting is, who the main “players” are, and how to keep everything in harmony.
With a friendly, science-made-simple approach, this section breaks down the basics—so you feel confident whether you toss scraps into a compost pile, turn a compost tumbler, or nurture worms in vermicomposting.
What Is Composting and How Does It Work?
Composting is nature’s way of recycling. When you add fruit peels, old lettuce, grass clippings, and even eggshells to a compost bin, tiny creatures and microbes team up to break down these scraps, turning them into rich, dark soil called compost.
It’s like having invisible gardeners hard at work 24/7.
Imagine a banana peel. Left in your bin, it’s food for bacteria, fungi, and wiggly worms. With a bit of warmth, air, and moisture, these helpers munch away, changing the leftovers into crumbly compost that brings life to your garden.
They work best when your bin has the right balance of “food”: some with lots of nitrogen, and some with lots of carbon.
For a visual guide on these basics and how different composting systems work (including fun options like the compost tumbler), you can check out this easy-to-follow composting guide.
Meet the Key Players: Nitrogen vs. Carbon
Think of your compost bin as a recipe, and just like any good recipe, it needs the right ingredients.
The two stars here are nitrogen and carbon.
- Nitrogen (“Greens”): These materials are moist and packed with protein. Examples include fruit and veggie scraps, fresh grass clippings, coffee grounds, and even egg shells. Nitrogen is the power food for the microorganisms—helping them grow and multiply.
- Carbon (“Browns”): These are dry and often brown in color. Think dead leaves, cardboard, twigs, and shredded newspaper. Carbon gives the compost pile structure, creates air pockets, and keeps things from getting slimy. Microbes digest “browns” for energy, just like we need carbs.
When you only add “greens,” you get a smelly, soggy mess.
Too many “browns” and your pile barely breaks down—think of it like trying to bake a loaf of bread with all flour and no yeast.
Knowing which materials bring which element is key for all composting methods, including vermicomposting and compost tumblers.
If you’re curious how each material helps, Composting 101 has a list of carbon and nitrogen sources for your pile.
 Photo by Jari Lobo
The Ideal Carbon-to-Nitrogen Ratio Explained
Now, here’s where it all comes together: you want the right mix of nitrogen and carbon for quick, rich compost.
Scientists talk about the “carb-to-protein” of the compost pile—the Carbon to Nitrogen Ratio, or C:N ratio. The best balance is about 30 parts carbon to 1 part nitrogen (or 30:1).
Think of it like baking a cake. If you add way too much flour (carbon) but forget the eggs (nitrogen), your cake never rises and stays dry.
Too many eggs and it’s a gooey flop. Compost works the same way!
- Easy rule: For every bucket of wet “greens,” add 2-3 buckets of dry “browns.”
- Ratio doesn’t need to be exact to make great compost, but aiming for this balance helps prevent smells and speeds up the process—whether you use a compost pile, tumbler, or vermicomposting.
Mastering the ratio not only makes your bin run smoothly, it also means you recycle faster, reduce waste, and get a healthy garden boost.
For more on why composting matters for your home and garden, see the Advantages of Composting at Home.
For practical steps and more tips, explore these seasonal composting tricks, which cover keeping your bin in balance year-round.
With a bit of practice, you’ll soon know exactly how to balance nitrogen and carbon in homemade compost bins—making every peel, stem, and leaf count!
Building a Balanced Compost Bin: Practical Steps
Balancing nitrogen and carbon in homemade compost bins doesn’t have to feel like guesswork. Setting yourself up for composting success is all about knowing what to toss in, how to keep things mixed, and what to do if something smells off or nothing seems to happen.
Grab your kitchen bucket, your garden gloves, and let’s make building a healthy, balanced compost bin easy for everyone.
Gathering Your Materials: Greens and Browns List
Knowing your “greens” from your “browns” is the first step to smooth composting at home. Fruit peels and coffee grounds might sound different from dry leaves and torn cardboard, but together, they’re the heart of every good compost.
Nitrogen Sources (“Greens”) bring energy to boost those busy compost microbes. Simple, beginner-friendly greens include:
- Fruit and vegetable scraps (apple cores, carrot tops, salad leaves)
- Fresh grass clippings
- Coffee grounds (even the paper filter is fine)
- Tea bags (without plastic)
- Plant trimmings (flowers, herbs, weeds without seeds)
- Eggshells (add crunch, but rinse first if possible)
Carbon Sources (“Browns”) add structure and soak up extra liquid, keeping the pile light and airy. Good browns to start with:
- Dry leaves and straw
- Shredded cardboard and newspaper (avoid glossy print)
- Sawdust or wood shavings (untreated wood only)
- Small twigs and sticks
- Cereal boxes or paper bags (small pieces)
- Dried grass or hay
Want to see how these come together? Our compost layering technique guide shows how to mix and stack greens and browns for the perfect start.
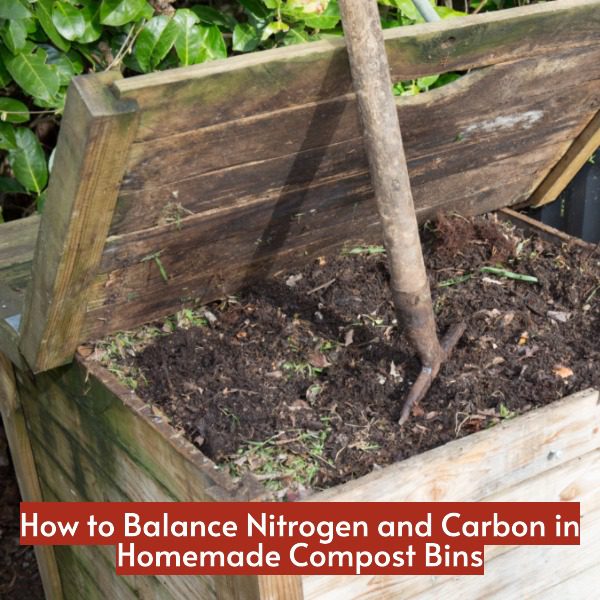
Mixing and Maintaining: The Hands-On Guide
Once you’ve gathered your pile of kitchen and garden waste, it’s time for the fun part—mixing!
Whether you have a compost bin, a tumbling composter, or you’re getting into vermicomposting, a few simple steps will help keep the balance right.
- Start with a Layer
Place a base of browns (like torn cardboard or dry leaves) at the bottom of your bin. This keeps air flowing. - Add Greens and Browns
Aim for two or three handfuls of browns for every handful of greens. Alternate layers—one dry, one wet. This simple pattern works for regular bins and compost tumblers. - Moisten Lightly
Give your pile a sprinkle of water if it looks dry. You want it to feel like a damp sponge, not soaking wet. - Mix and Turn
Every week or two, use a pitchfork or compost aerator to fluff up the pile. In a compost tumbler, just give it a spin. Worm bins (vermicomposting) need less turning, but gentle mixing helps too. - Watch and Wait
After mixing, check for progress. Warmth and a pleasant earthy smell mean everything’s working.
A stepwise approach like this not only keeps things simple but helps avoid the headache of a stinky or stalled bin.
If you’re just starting, try out these composting tips and tricks to make the process even smoother.

Photo by Alfo Medeiros
Common Mistakes and How to Fix Them
Composting isn’t always neat—sometimes, things can go sideways. No one wants a bin that smells bad or a heap that never changes.
Here’s how to solve the most common composting problems and keep things on track:
- Wet or Smelly Compost:
Too many greens or not enough air will leave your compost soggy and foul-smelling.
Fix: Add extra browns (like shredded newspaper), fluff the pile, and keep the lid off for a while. - Dry and Not Breaking Down:
If your compost looks like a pile of cardboard and nothing’s happening, it’s probably bone dry or short on greens.
Fix: Mix in more greens (veggie scraps or grass) and add a little water. Chopping scraps smaller also speeds things up. - Compost is Stalled or Cold:
Pile not heating up? You may have too little nitrogen or your pile is too small.
Fix: Increase your greens and mix well. For bins and tumblers, check that you’re adding enough fresh materials. - Pests or Flies:
If critters stop by your bin, food scraps may be exposed.
Fix: Always cover kitchen scraps with browns or soil and avoid adding meat or dairy.
Feeling stuck? Many composters run into small problems, but a few simple tweaks go a long way. If you want more guidance, see our Composting Calendar Tips for step-by-step advice every season.
Taking these easy steps means your compost stays balanced and productive, whether you choose a classic bin, a compost tumbler, or even a worm-filled vermicomposting tray.
If you have questions along the way, you’re not alone—explore the Compost Charm site to ask questions or dig into more hands-on guides.
Looking for more ways to get the whole family involved or for advanced tips on material choices?
For many, learning how to balance nitrogen and carbon in homemade compost bins is just the start of a journey to healthier soil and less waste.
Troubleshooting, Tips, and Seasonal Success
Every compost bin has its ups and downs—sometimes your pile is too soggy, sometimes you find clumps that won’t break down, and sometimes the weather just won’t cooperate.
Keeping your kitchen scraps and garden waste turning into crumbly garden gold means staying flexible, learning from what you see (and smell), and making small tweaks when things aren’t quite right.
Let’s keep it simple: here’s how you can fix common composting issues, adjust for the seasons, and experiment with new composting methods in a way that makes sense for real households.
Easy Fixes for Uneven Compost
A healthy compost bin needs the right balance of nitrogen and carbon, but even the best setups hit snags.
If your compost is out of balance, don’t worry—a few simple changes can set things straight.
- Too wet or soggy?
Heavy rains, too many food scraps, or layers that are packed too tightly will make your compost go from earthy to stinky.- Add more dry “browns” like shredded cardboard or dry leaves.
- Mix the contents to introduce more air.
- Keep the lid slightly ajar if you’re using a bin, letting extra moisture escape.
- Too dry and slow?
If your pile looks dusty or hasn’t changed in weeks, it needs moisture and more nitrogen.- Sprinkle with water until the pile feels like a wrung-out sponge.
- Add more “greens” such as kitchen scraps or even coffee grounds.
- Chopping up waste before adding it also speeds things along.
- Clumpy or matted compost?
Mats of grass or soggy leaves create stubborn lumps that microbes can’t break down.- Fluff the pile or tumble it if you use a compost tumbler.
- Break up clumps with a garden fork or gloved hands.
- Mix in more airy browns to loosen things up.
Using bins, tumblers, or a basic pile, you’ll find that troubleshooting compost usually comes down to adding the right ingredient and mixing things up a little more. For more detailed troubleshooting charts, the Compost Troubleshooting Tips page breaks it down by symptom.
Adjusting for Seasons and Weather
Mother Nature loves to keep composters on their toes.
Each season brings its own challenges and opportunities for your compost bin, whether you’re in a warm climate or toughing it out through winter.
 Photo by Kris Møklebust
- Spring: Bins heat up fast as temperatures rise. Stir the pile more often to keep microbes busy and add water during dry spells.
- Summer: Evaporation kicks in. Shade your compost, water frequently, and keep greens and browns balanced so things don’t dry out.
- Autumn: Leaves are everywhere—gold for the compost heap! Stockpile extra leaves (carbon) now for use throughout the year.
- Winter: Composting slows down, but don’t stop. Insulate with straw or cardboard, and keep adding food scraps. Turning the pile will help maintain warmth.
A compost tumbler can give you more control all year round, and worm bins (vermicomposting) can even be kept in sheds or garages. If you want to see what to focus on during every season—and why it’s smart to adjust your compost habits over the year—take a peek at these Composting Calendar Tips.
Experimenting with Compost Methods and Bins
Getting creative with your compost bin doesn’t just solve problems—it makes the whole process more fun.
There’s no single “right” way to balance nitrogen and carbon. Instead, finding what works for your space, family, and style keeps things interesting.
- Try a compost tumbler:
Tumblers make turning easy and keep moisture and air more consistent, perfect for small gardens or patios. - Vermicomposting:
Worm bins work great indoors or in protected outdoor spots. Worms love a steady supply of “greens” and shredded newspaper (“browns”)—and they turn scraps into compost fast. - DIY setups:
Feeling handy? Repurposing a trash can can be a smart (and cheap) way to start. Drill holes for airflow, then follow the same rules for layering greens/browns. See the DIY trash can composter guide for setup tips and an easy walkthrough.
Changing up your composting style can help you find the best routine for balancing nitrogen and carbon in homemade compost bins.
Don’t be afraid to ask questions or trial new techniques.
If you want to chat about troubleshooting or share your compost experiment stories, head to the Ask A Question tool, where fellow composters and helpful guides are always ready.
Try these small tweaks, embrace the seasons, and keep learning.
Soon, you’ll be a composting pro with healthy soil—and not a single kitchen scrap will go to waste!
Conclusion
Keeping the right mix of nitrogen and carbon is the secret to compost that breaks down fast, smells fresh, and gives your garden a healthy boost.
Whether you use a classic bin, a compost tumbler, or dive into vermicomposting, the steps are simple: feed your pile both “greens” and “browns,” mix and turn regularly, and adjust as you go. Even small fixes—like adding more leaves or chopping food scraps—make a big difference.
With a little attention, you’ll turn waste into garden gold and help the planet reduce landfill.
Home composting is truly for everyone. Every banana peel, bit of cardboard, or handful of coffee grounds brings you closer to healthy soil and a sustainable lifestyle.
If you’re inspired to make the most of your kitchen scraps, visit the Don’t Toss It Campaign for smart ideas on what can go in your bin.
Every heap that’s balanced well turns into the soil that grows your next meal. Ready to give your compost pile a boost?
Keep experimenting and have fun—your plants (and the environment) will thank you.
Composting FAQ
How do I know if my compost is balanced?
Healthy compost smells earthy, warms up, and shrinks over time. If it’s smelly or soggy, add more carbon-rich browns.
If it’s dry or not breaking down, toss in some nitrogen-rich greens.
What if I use a compost tumbler or try vermicomposting?
A compost tumbler makes turning easy and keeps air moving, while vermicomposting lets worms help with the breakdown.
Both methods still need a good mix of greens and browns to work their best. You’ll find more about equipment and methods at Compost Tumbler Options.
Can I compost during winter?
Yes! Your pile may slow down, but you can keep adding scraps and leaves.
Insulate your bin and keep turning it when you can. For more all-season tips, see these Composting Calendar Tips.
Want more ideas or want to start today? Head over to Starting Composting at Home for step-by-step support.
Thanks for making the world a little greener, one compost bin at a time! What will you compost next?