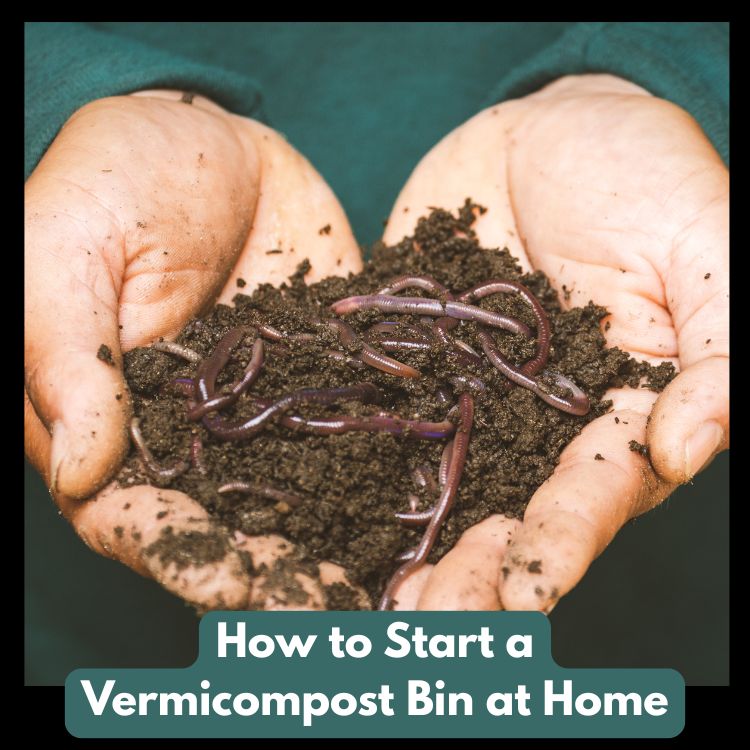
How to Start a Vermicompost Bin at Home
Vermicompost for Beginners: A Fun, Eco-Friendly Way to Turn Scraps into Soil Magic
Hey there! If you’re curious about vermicompost for beginners and want to dive into a cool, sustainable way to recycle food scraps, you’re in the right place.
I’m thrilled to share my journey with vermicomposting—turning kitchen waste into nutrient-rich compost with the help of some wiggly friends: worms!
Whether you’re a young gardener, a parent looking for a fun project for kids, or just someone who wants to live a bit greener, vermicomposting is an awesome, low-effort way to make a difference.
Let’s break it down in a way that’s easy to grasp, sprinkle in some science that even a kid can get, and toss in tips to make it a breeze.
What Is Vermicomposting, Anyway?
Vermicomposting is like composting’s cooler cousin. Instead of letting heat and microbes do all the work (which can take months), you team up with worms to break down food scraps, paper, and other organic stuff into super-rich compost called worm castings.
These castings are basically worm poop, and they’re like gold for plants—packed with nutrients that help flowers, veggies, and herbs grow strong.
Here’s the science bit, explained simply: worms eat your kitchen scraps, like apple cores or carrot peels. Inside their tiny bodies, they mix the food with enzymes and good bacteria.
What comes out is a dark, crumbly material full of nitrogen, phosphorus, and potassium—stuff plants love. It’s nature’s way of recycling, and it happens faster than regular composting, often in just 8–12 weeks.
Why do I love it? It’s low-maintenance, doesn’t stink if done right, and feels like a mini science experiment in my kitchen.
Plus, it’s a great way to cut down on trash—about 30% of what we throw out can be composted instead!
Tip: Start small. You don’t need a big setup to try vermicompost for beginners—just a bin, some worms, and a corner of your home.
Why Vermicomposting Is Awesome for Beginners
If you’re new to this, here’s why vermicompost for beginners is such a win:
- It’s Easy: Worms do most of the work. You just feed them and keep their home cozy.
- Space-Friendly: No backyard? No problem! A small bin fits in a closet, garage, or under the sink.
- Eco-Warrior Vibes: You’re keeping food waste out of landfills, where it would release methane, a gas that heats up the planet.
- Plant Power-Up: Worm castings make your garden or houseplants thrive—think bigger tomatoes or brighter flowers.
- Kid-Friendly: Kids love watching worms wiggle and learning how they help the earth.
Fun Fact: A single worm can eat about half its body weight in food scraps each day. That’s like you eating half your weight in pizza—imagine that!
Getting Started with Vermicompost for Beginners
Ready to give it a whirl? Here’s how to set up your own vermicomposting system. Don’t worry—it’s simpler than it sounds.
Step 1: Grab a Worm Bin
You need a home for your worms. A basic plastic storage bin with a lid works great, but make sure it’s dark (worms hate light) and has holes for air and drainage.
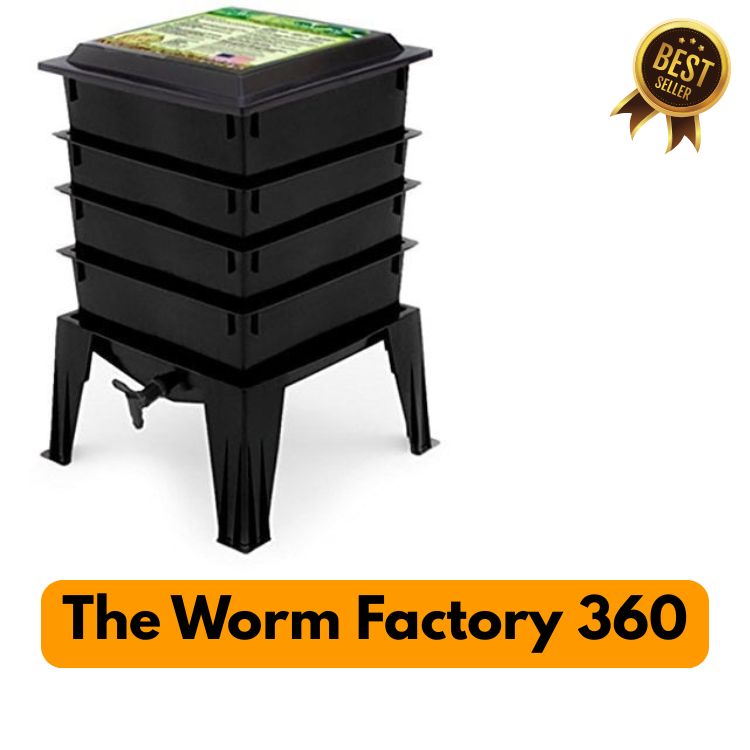
I recommend the Worm Factory 360, a stackable bin that’s perfect for beginners. It’s got trays to separate worms from compost, a tap for excess liquid, and comes with clear instructions.
You can find it online for about £80–£100, and it’s built to last.
Tip: Drill tiny holes in the sides and bottom of a DIY bin for airflow, and place a tray underneath to catch any drips.
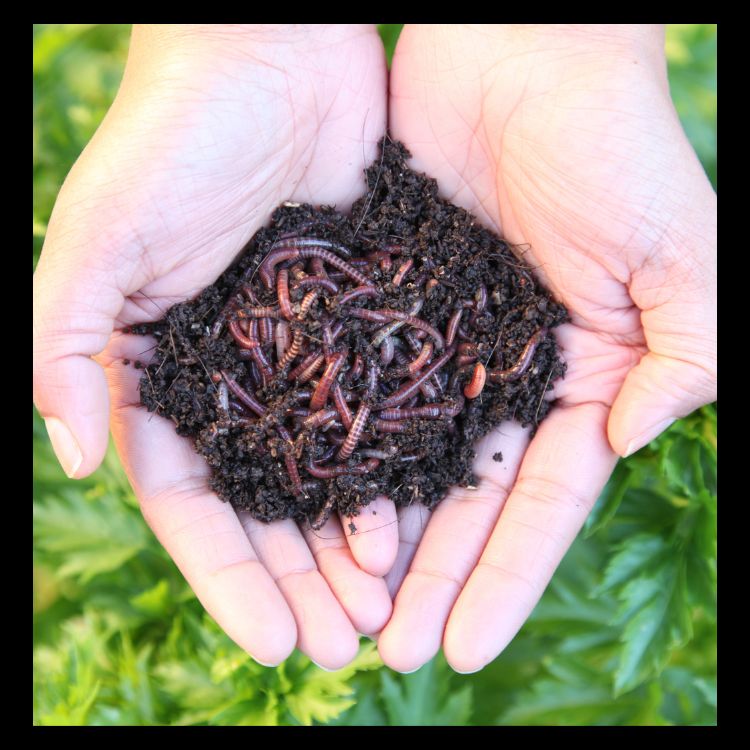
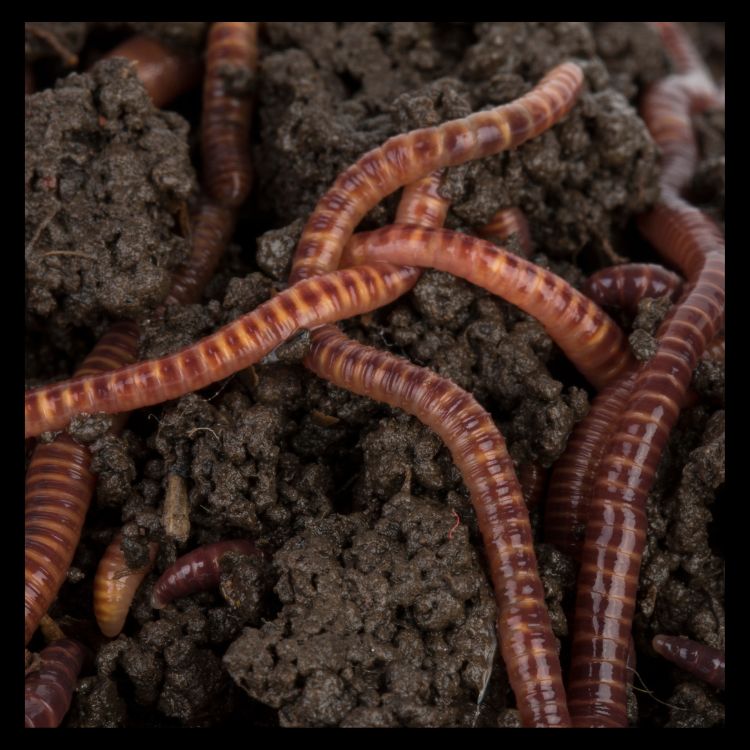
Step 2: Pick the Right Worms
Not all worms are created equal. For vermicompost for beginners, go for red wigglers (Eisenia fetida). They’re small, hungry, and love munching on scraps.
You can buy 500–1,000 worms (about £20–£40) from garden centres or online shops like Amazon or Wiggly Wigglers.
Start with a small batch—you can always add more later.
Science Tidbit: Red wigglers have five hearts and can live up to two years if you treat them right. They’re like tiny superheroes!
Step 3: Make a Cozy Bed
Worms need bedding to burrow in. Shredded newspaper, cardboard, or coconut coir (a sustainable fibre from coconuts) works great.
Soak the bedding in water until it’s damp like a wrung-out sponge, then fluff it up in the bin.
Add a handful of garden soil to kickstart the microbe party—it helps the worms digest food.
Product Pick: I like EcoCoir for bedding (£10 for a brick). It’s eco-friendly, holds moisture well, and worms love it.
Step 4: Add Your Worms and Food
Pop your worms into the bedding and give them a small amount of food to start—think a cup of chopped veggie scraps like lettuce, banana peels, or coffee grounds.
Bury the food under the bedding to keep flies away. Feed them once a week, and don’t overdo it—too much food can make the bin smelly.
Hint: Chop scraps into small pieces. It’s like giving worms bite-sized snacks they can handle faster.
Step 5: Keep It Comfy
Worms like it cool and moist, between 15–25°C (59–77°F). Keep your bin in a shady spot, like a basement or under the kitchen sink.
Check the bedding weekly—if it’s dry, spritz it with water. Too wet? Add more dry bedding.
Tip: If you’re worried about odours, a BioOrb Compost Bin Filter (£5) can keep things fresh.
Check out Best Compost Bins With A Filter
Are Potato Peels OK for Worms?
A question I get a lot is, “Are potato peels OK for worms?” The short answer: yes, but with a little care. Potato peels are a great food source for your vermicomposting bin—they’re starchy, soft, and break down fairly quickly, which worms love.
They’re packed with carbon and some nutrients, making them a solid addition to your worms’ diet. However, there are a couple of things to watch out for to keep your worms happy and your bin healthy.
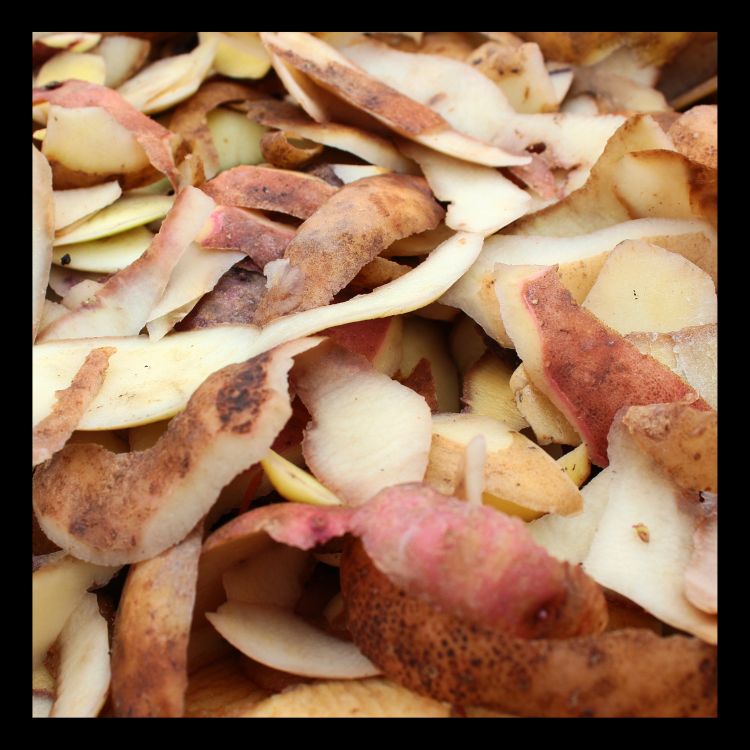
First, make sure the peels are free of green spots or sprouts. These parts of a potato contain solanine, a natural toxin that’s not great for worms (or humans!).
Cut away any green bits before tossing peels in. Second, don’t overload the bin with potato peels—they’re dense and can clump together, slowing decomposition and potentially causing a funky smell if not balanced with airy bedding like shredded paper.
I’d mix in a handful of peels with other scraps, like carrot tops or apple cores, and bury them deep to avoid attracting pests.
Another tip: chop the peels into smaller pieces to speed things up—worms can process them faster that way.
Cooked potato peels are fine too, but avoid anything fried or oily, as fats can mess with the bin’s balance.
In moderation, potato peels are a worm-friendly treat that adds variety to their menu, helping you create rich compost without waste.
What Not to Feed Your Worms
To keep your bin happy, avoid these:
- Meat, dairy, or oily foods: They stink and attract pests.
- Citrus in big amounts: Too acidic for worms.
- Onions or garlic: They can make the bin smell bad.
- Plastic, foil, or pet waste: Worms can’t eat these, and they’re harmful.
Hint: If you’re unsure, ask yourself, “Would this rot nicely in nature?” If not, skip it.
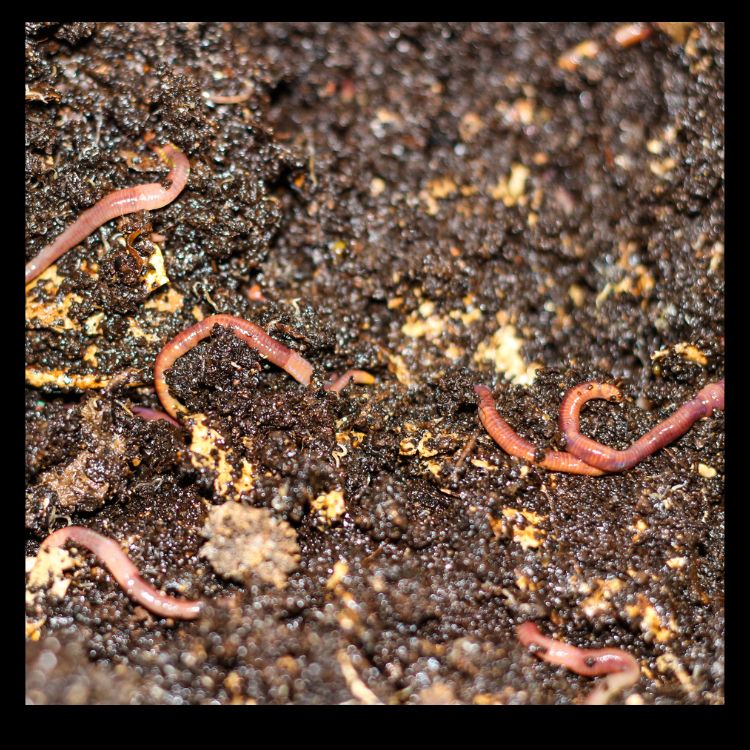
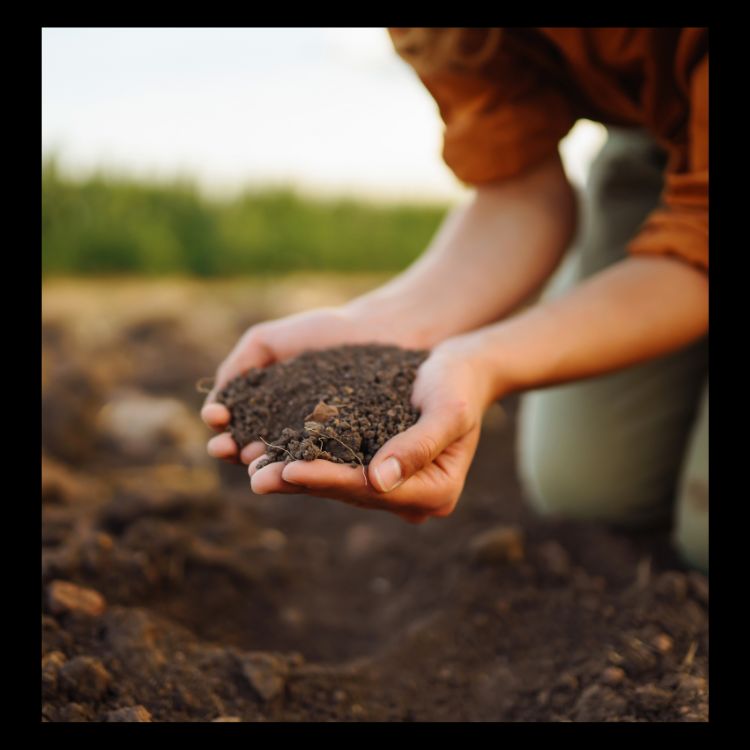
Harvesting Your Compost
After a couple of months, you’ll notice dark, crumbly castings in your bin—congrats, you’ve made vermicompost!
To harvest, try the “light trick”: dump the bin’s contents onto a tarp in bright light.
Worms will burrow down to escape the light, letting you scoop off the compost from the top.
Keep the worms and some bedding to start the next batch.
Want a faster way to compost other scraps? Check out my guide on how to use the FCMP Outdoor IM4000 Dual Chamber Tumbling Composter for fast compost. It’s a great combo with vermicomposting!
Product Rec: The FCMP Outdoor IM4000 (£90) is awesome for bigger compost projects. Its dual chambers let you process two batches at once, and it’s sturdy for outdoor use.

Benefits of Vermicompost for Your Plants
Using vermicompost is like giving your plants a superfood smoothie. Here’s why:
- Nutrient Boost: Castings have more nitrogen, phosphorus, and potassium than regular soil, helping plants grow faster.
- Soil Health: It improves soil structure, so roots can breathe and water stays put.
- Disease Resistance: The good microbes in castings fight off plant pathogens.
- Eco-Win: You’re recycling waste and reducing landfill methane.
Tip: Mix 10–20% vermicompost into potting soil for houseplants or sprinkle it around garden beds for a quick boost.
Who Is Vermicomposting For?
Vermicompost for beginners is perfect for:
- Kids and Families: It’s a hands-on way to learn about nature and recycling. Kids love naming their worms!
- Apartment Dwellers: No garden? No worries—a small bin fits anywhere.
- Eco-Conscious Folks: If you want to reduce waste, this is a fun, impactful step.
- Gardeners: Whether you grow herbs or veggies, worm castings will level up your plants.
How easy is it? Super easy! Once your bin is set up, it’s just a matter of tossing in scraps weekly and checking moisture.
It’s less work than mowing a lawn or walking a dog, and the worms handle the heavy lifting.
10 FAQs About Vermicompost for Beginners
- How many worms do I need to start?
About 500–1,000 red wigglers is plenty for a small bin. They’ll multiply as they get comfy. - Will my bin smell bad?
Nope, if you don’t overfeed or add meat/dairy. A healthy bin smells earthy, like wet soil. - Can I keep my bin outside?
Yes, but keep it in shade and insulate it in winter—worms don’t like extreme heat or cold. - How often do I feed my worms?
Once a week is good. Start with a cup of scraps and see how fast they eat it. - What’s the best bedding?
Shredded newspaper or coconut coir is cheap and worm-friendly. Keep it damp but not soggy. - Can worms eat coffee grounds?
Yup, in moderation! They’re like a treat—don’t overdo it. - How long until I get compost?
About 2–3 months, depending on how many worms and scraps you have. - Do worms bite or escape?
No biting—they don’t have teeth! They might try to escape if the bin’s too wet or dry, so check conditions. - Can I use vermicompost right away?
Yes! It’s ready to use—no curing needed, unlike regular compost. - Where can I learn more about composting?
Try my guide on how to use the FCMP Outdoor IM4000 Dual Chamber Tumbling Composter for fast compost for extra tips!
Wrapping It Up
Vermicompost for beginners is a fantastic way to dip your toes into eco-friendly living. It’s simple, rewarding, and lets you team up with nature’s tiny recyclers to make something amazing—rich compost that your plants will thank you for.
With a basic bin, some red wigglers, and a bit of kitchen waste, you’re on your way to creating soil magic. Whether you’re a kid curious about worms or an adult wanting to green up your routine, this is a project anyone can tackle.
So, grab a bin, adopt some worms, and start your vermicomposting adventure.
You’ll be amazed at how fun it is to turn scraps into treasure—and how happy your plants will be!