
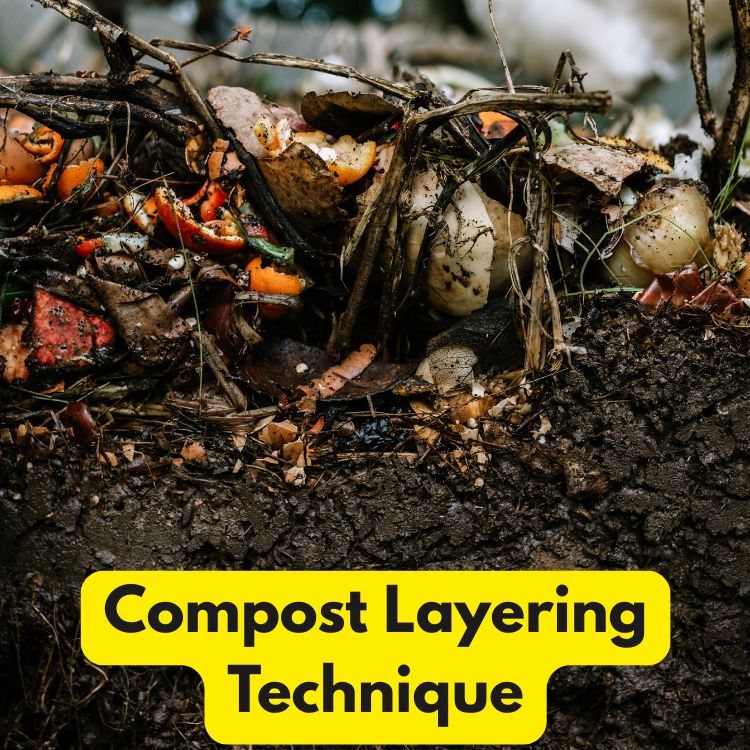
Learning a simple Compost Layering Technique can really help you understand composting plus it gives your pile the perfect way to decompose for the best result.
Compost Layering Technique Made Fun:
The Playful Guide to Smell-Free, Pest-Free Composting
Imagine your kitchen scraps and garden clippings turning into garden gold without smelly mishaps or inviting every fly in the neighborhood.
That’s the magic trick behind the Compost Layering technique—sometimes called “lasagna composting” because, yes, it’s all about stacking!
Whether you’re a veggie-chopper, flower-deadheader, or even a serial banana-peel-tosser, this method keeps composting clean, simple, and way less gross.
Here’s the scoop: you layer “greens” (the wilted salad, coffee grounds, garden trimmings) with “browns” (leaves, straw, shredded cardboard).
The real secret? Never let your food scraps peek out! Sandwiching those kitchen scraps in a cozy nest of dry browns nixes the stink and keeps pests out.
If you want a deep dive into smart ways to layer and manage your heap, check out the straight-talking advice at 6 clever methods for home composting.
A few handy tools can make life easier too—a countertop compost caddy for collecting scraps, a stash of dry leaves or straw nearby, and gloves (if you’re sensitive to nature’s goo).
With these basics, you’ll have a neat, smell-free pile that breaks down into rich compost for your plants, no drama required.
And yes—kids and spouses might even want a turn!
The Lasagna Method: Stacking Up Your Success
Picture a compost pile that works like a layered cake—except this one turns veggie peels into earthy goodness and leaves your garden begging for a taste.
That’s the magic behind the Lasagna Method, the superstar of the Compost Layering Technique. By carefully stacking your “browns” and “greens,” you’re not just making compost—you’re throwing a soil-boosting party and everyone’s invited, from kitchen scraps to backyard leaves.
Let’s peek under the top “noodles” and see what keeps this compost casserole bubbling.
The Science Behind the Layers
The secret ingredient for successful compost? Striking the right balance between carbon-rich “browns” and nitrogen-packed “greens”.
Browns are your dried leaves, shredded cardboard, straw, and sawdust—think crunchy, dry, and brown-ish.
Greens are all things fresh, moist, and packed with nutrients: grass clippings, kitchen scraps, wilted veggies, and coffee grounds.
- Browns = Carbon-rich. They keep things airy, soaking up smells and moisture.
- Greens = Nitrogen-rich. They feed the tiny decomposers and keep the pile cooking.
Layering these two isn’t just about looks. Browns give structure to the heap, stopping it from turning into a slimy, soggy mess.
Greens provide dinner for all the bacteria, fungi, and worms. They’re like the main course at a compost buffet. These layers quickly become a comfy home for microbes.
With the right structure, your compost pile supports billions of microbes that break everything down into rich soil.
If your layers aren’t balanced, you’ll notice it—think slow decomposition, bad smells, or pests moving in.
For more on the role of microbes in compost, Cornell’s guide on compost microorganisms breaks down who’s who in the pile.
The Environmental Protection Agency also shares practical insights on how carbon and nitrogen fuel these tiny workers in their home composting guide.
Step-by-Step: Building Your Compost Pile
Building your lasagna compost is easier than making actual lasagna (plus, no dishes to wash). Here’s how to stack successfully, from the bottom up:
- Start with a nest of browns. Lay down dry leaves, straw, or shredded cardboard at the bottom of your bin. This first layer acts as a sponge and air filter to keep the pile breathing.
- Add your greens. Toss in kitchen scraps, plant trimmings, or coffee grounds. Chop or tear large pieces to help them break down faster.
- Cover with more browns. Always tuck your greens under a dry, carbon-rich blanket. This keeps flies, smells, and nosy critters away.
- Repeat: Keep stacking browns and greens like a chef layering noodles and sauce. Add a brown layer after every new green addition to stay on the smell-free train.
- Top it off with browns. Always finish with a good layer of dry material. This is your compost pile’s do-not-disturb sign for pests.
Need help with keeping your pile tidy? Keep a basket of shredded cardboard or a sack of dry leaves right next to your compost heap.
That way, you always have browns handy.
When it’s time to clean out your kitchen scrap pail, a handful of dry leaves or straw in the bottom makes things less sticky and keeps odors away.
 Photo by Skyler Ewing
A countertop caddy is perfect for quick storage of kitchen scraps before you trot out to the pile.
If you want more layering tips or methods for managing the mess, check out 6 clever methods for home composting.
Keeping browns dry is key. Store leaves in an old bin, keep newspaper near your caddy for unexpected green overloads, and consider a pitchfork or compost aerator—turning piles gets faster and easier.
With the right stack, your compost does its thing, and you spend more time admiring your garden than hunting for air freshener.
Troubleshooting: When the Pile Isn’t Smiling
Sometimes, even the happiest compost pile throws a tantrum. Maybe it’s stinking up the yard, drawing in pests, or just looking a little glum.
Don’t panic! Most composting conundrums are quick to fix with the right moves.
The Compost Layering technique is all about harmony, but when things go sideways, a little DIY TLC can get your pile grinning again.
Quick Fixes for Common Issues:
List rapid remedies for smelly or pest-laden piles. Encourage readers not to give up at the first whiff of trouble.
You’re doing everything by the compost book—layers of browns, a sprinkle of greens—then suddenly, the air around your pile is less “earthy forest” and more “forgotten gym bag.”
Or, you spot more critters in your bin than on a nature walk. Here’s how to hit the reset button fast:
- Smells Like Trouble:
- If your compost smells sour, rotten, or like an outhouse, it’s likely too wet or too rich in greens. Add a generous layer of dry browns (leaves, cardboard, straw) and give the heap a good turn.
- Spreading the pile out on a tarp under the sun can help dry it out and melt away those nasty odors, as mentioned by others dealing with stinky piles on forums such as Reddit.
- For an easy fix, sprinkle in baking soda or wood ash every couple of weeks—just a small amount to neutralize acid and control smells. More tips are over at Wormgear’s guide to reducing compost bin odors.
- Always cap off kitchen scraps with a thick layer of browns. Covering is your best shield against stink.
- Pesky Pests Making Themselves at Home:
- Avoid meats, dairy, oils, and cooked foods—these wave a big ‘OPEN’ sign for raccoons, rodents, and flies. Stick to raw fruit, veggie scraps, and garden waste.
- If bugs or rodents sneak in, tighten up: use a bin with a lid, or line your pile with fine mesh wire. Fine mesh can keep even tiny insects out, a trick suggested in several composting communities (details here).
- Make sure no food scraps are visible on the top. Every time you dump greens, follow with a brown blanket to keep flies at bay.
- Wood chips, twigs, or even shredded paper boost structure and deter burrowing pests.
- Too Wet, Too Dry, or Just Not Breaking Down?
- If the pile’s soggy, add browns and fluff with a pitchfork.
- Too dry? Sprinkle with water (think damp sponge, not muddy swamp).
- Stalled decomposition usually means out-of-balance greens and browns or not enough oxygen. Turn the pile every week or two for a fresh breath of air.
- Curious how layering can fix more issues? See which methods keep piles thriving at 6 clever methods for home composting.
 Photo by Greta Hoffman
Don’t let one hiccup nudge you off the Compost Layering technique. Troubleshooting is part of the game.
And sometimes, all you need is a handy tool (like a sturdy compost aerator or mesh for pest control) to get things humming again.
For even more composting tricks, the pros at Gardening Know How offer a big-picture look on how to handle compost pests and odors (here’s how to fix smelly bins and animal pest tips).
A little patience, a dash of dry leaves, and a few minutes with your pitchfork—it’s all most piles need to bounce back and keep churning out garden gold.
Gear Up: Tools and Tips to Turn You Into a Compost Layering Pro
Rolling up sleeves and jumping into the Compost Layering technique doesn’t mean you need an arsenal of pricey tools—or the patience of a saint.
But with a handful of clever tips and some solid gear, you’ll keep your system running like a well-oiled machine (minus the oil, of course).
Let’s get into the oddball habits and must-have gadgets that make keeping your compost tidy and hassle-free almost second nature.
Keeping It Clean and Convenient:
Include quirky tips like using leaves or straw to clean the bucket, having a designated trash can for non-compostables, and setting up a dry storage system for browns
The heart of compost layering is a bit like running a tidy kitchen—you want to keep mess at bay, handle waste without extra chores, and never let sticky buckets or scattered scraps slow you down.
Over the years, I’ve picked up tricks that make the whole gig smoother… and a little more fun.
- Leaf or Straw “Brushes” for Your Bucket:
If you dread scrubbing out your kitchen scrap caddy, you’re not alone. Here’s a game-changer: grab a big handful of dry leaves or straw, bunch them together, and scrub the sides of your bucket before emptying the last of your food scraps into your pile. - It’s like washing without water—sticky bits and gunk cling to the browns, and you avoid that prehistoric soup-smell. Toss the leafy “brush” and all the gunk straight into the pile, hands clean and happy.
- Dry Browns Are Gold—Keep Them Handy:
Wet leaves or a soggy bale of straw in January? No, thanks. Stash your browns in a dry, covered bin or even a sealed tote. - This keeps them fluffy and ready for instant layering and mess-free cleaning. Setting up this dry reserve guarantees that, even in a downpour or a winter freeze, you’ve got perfect browns to tuck in your food scraps.
- Curious how to store and pick the right materials? The advice at 6 clever methods for home composting walks through brown storage bonuses.
- Designated Trash Can for Non-Compostables:
No pile’s immune to the stray produce sticker or mystery plastic lurking in vegetable peels. I added a small trash can with holes punched in the bottom near my bin, just to catch these imposters. - If I find a non-compostable when dumping my scraps, it goes in this can, safe from my beautiful pile but not stuck riding around in my pockets.
- Quick Grab Storage for Kitchen Scraps:
Keep a small, lidded caddy on your counter for daily scraps. Dump it when it’s full, add a pile of browns, and you’re back in business. - Stainless steel is easy to clean. Charcoal filters help with smells. Many composters swear by a simple bucket—or this budget-friendly pail starter kit that covers all the basics for beginners.
-
Essential Tools Every Layering Pro Should Have:

- Investing in the right tools transforms composting from a frustrating job to a smooth routine. These are the MVPs:
- Compost fork or pitchfork: For easy mixing and turning (a top pick on Reddit’s composting tools thread).
- Shovels and trowels: Perfect for scooping or aerating compacted layers.
- Compost thermometer: Keep tabs on your pile’s temperature, so you know when it’s “cooking.”
- Gloves: Because nobody enjoys “banana peel hands.”
Want to up your compost gear game? Check out this roundup of manual turners and mixing tools for even easier turning.
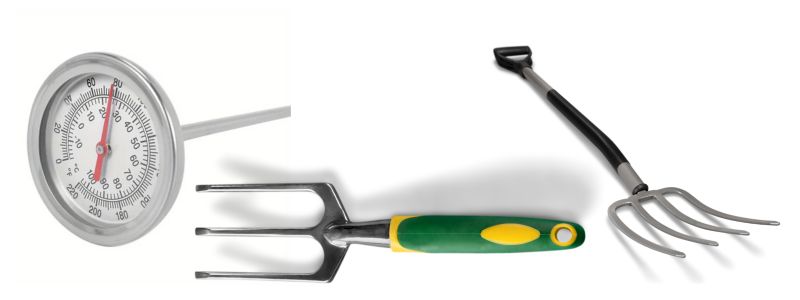
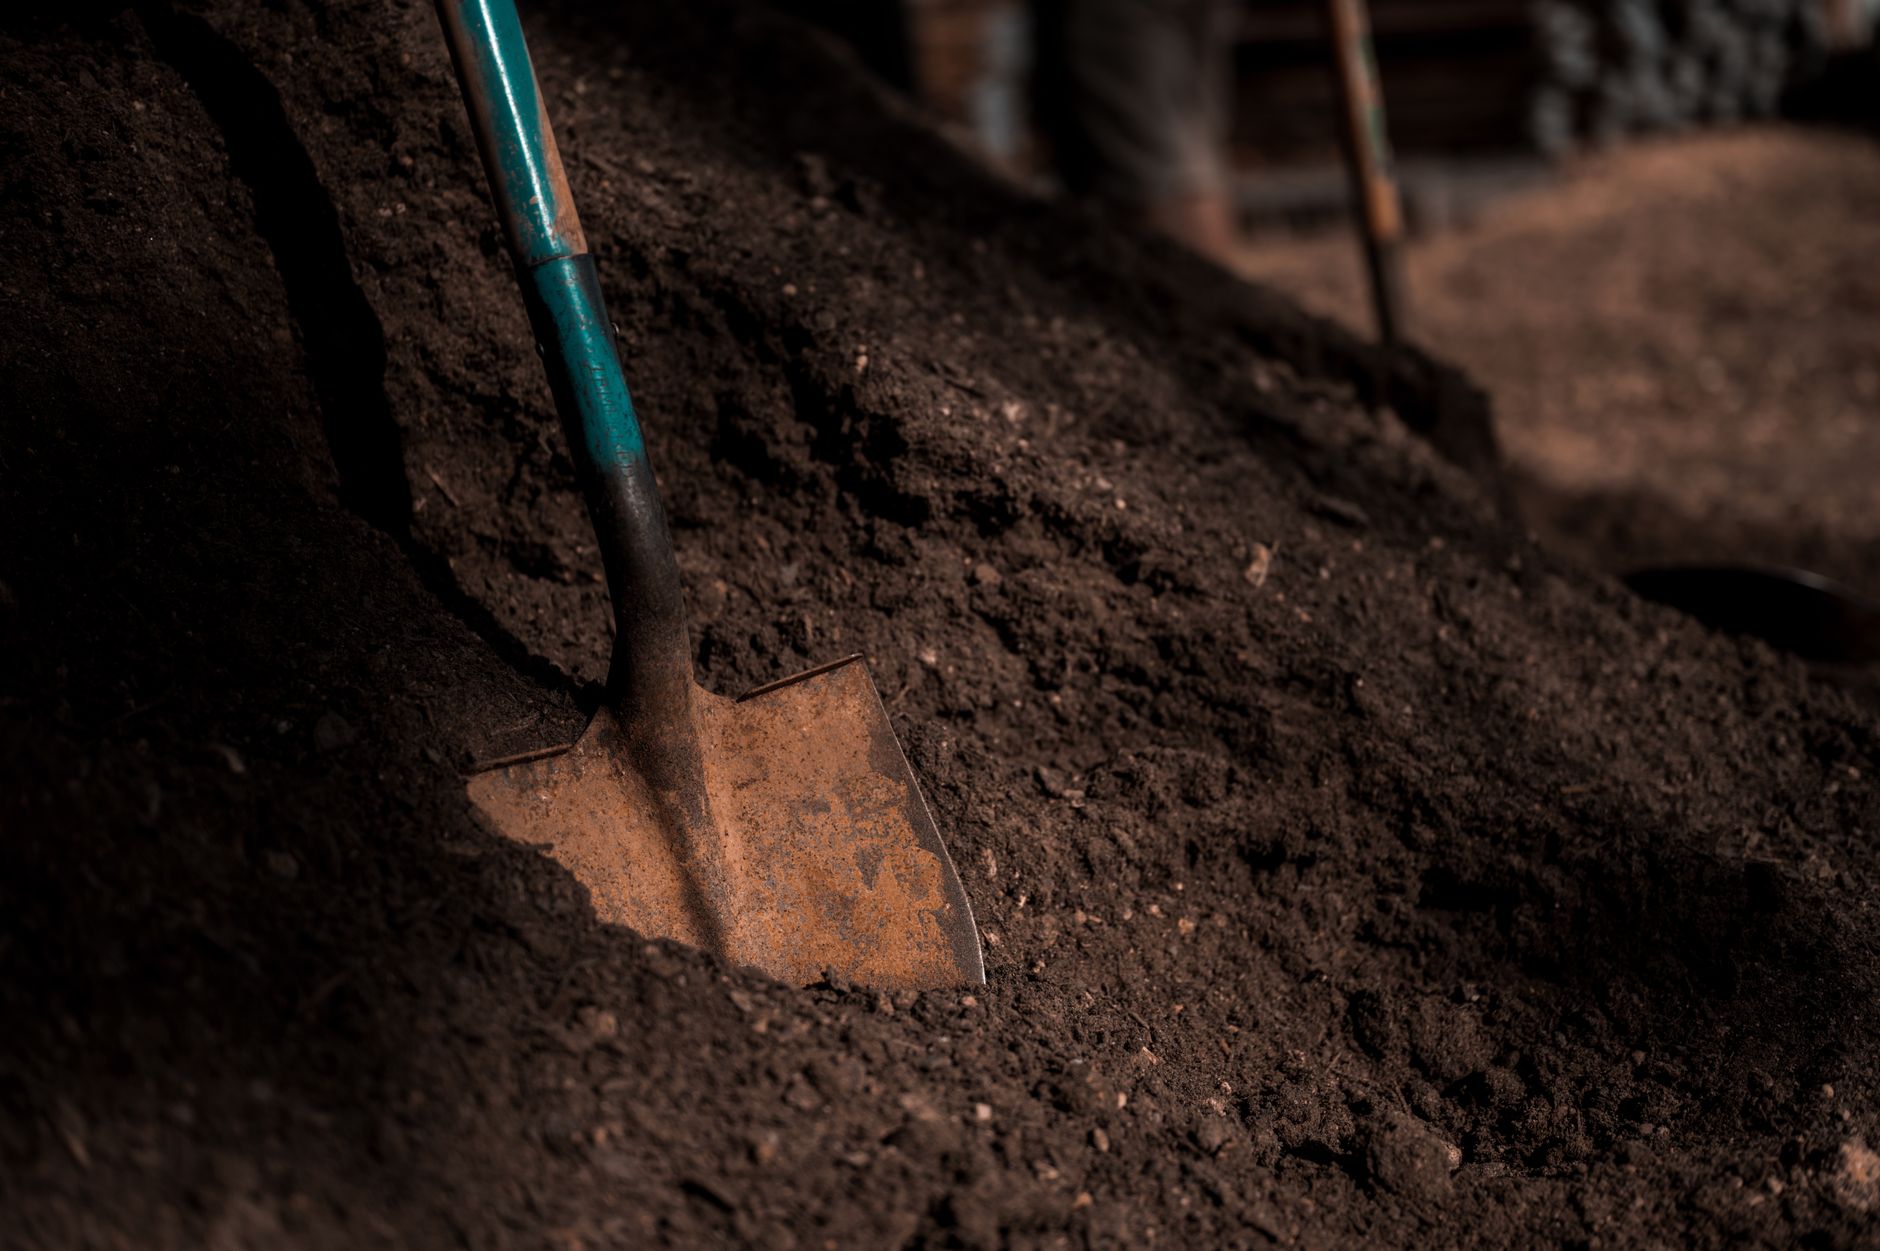 Photo by Alfo Medeiros
Browns and greens are the bricks and mortar of any compost layering technique, but these extra habits and tools turn you into a layering pro.
Set yourself up for neat, low-effort composting that’ll have your neighbors asking how your bin stays so tidy and smell-free.
Want more layering secrets? Hop to the guide on 6 clever methods for home composting, which packs plenty of advice for gear, habits, and keeping things efficient.
Conclusion
Compost Layering technique turns kitchen scraps and garden clippings into black gold, minus the fuss, stink, or swarms of bugs.
Once you get that greens-and-browns rhythm down—think more like jazz than math—the whole process feels almost automatic.
Tuck those food scraps in under dry browns, add a splash of water if needed, and let the microbes throw their party.
Go ahead and treat your pile to a pitchfork every few weeks for a little fresh air, or pick up a compost aerator to make turning easier.
Layering doesn’t require fancy gear, but having a sturdy caddy, a stash of dry leaves or straw, and maybe a thermometer for the curious makes it even smoother.
Tools like a heavy-duty scoop or mesh liner can help keep rodents out and turn winter composting into a breeze.
If you’re loving this easy approach, why not branch out and explore more clever compost methods?
Pop over to 6 clever methods for home composting for fresh ideas and pro tips. The Compost Layering technique isn’t just effective—it makes composting actually enjoyable. Thanks for sticking around.
Let’s keep those bins thriving, gardens lush, and food waste out of the landfill. Are you ready for your next round of garden alchemy?