Simple Steps for Better Compost and Healthier Soil
Every autumn, piles of leaves carpet the ground, tempting gardeners to put them to good use. If you’ve wondered what to do with all those leaves (and how to boost your garden’s health), you’re in the right place.
Learning how to make leaf mold is one of the simplest and most natural ways to turn yard waste into rich, crumbly compost.
Composting is simply nature’s way of recycling—breaking down plant scraps and transforming them into soil food.
This process matters because it keeps waste out of landfills and creates healthier soil for your plants.
Whether you like classic composting, vermicomposting, or even using a compost tumbler, adding leaf mold brings long-lasting benefits for both your garden and the planet.
A pile of leaves can slowly become black gold for your soil, saving money and helping the environment.
With just a bit of patience and the right how-to, anyone can get started.
If you’re ready to support your family’s gardening or want another way to live more sustainably, making leaf mold is a cheerful step in the right direction.
For an extra burst of garden nutrition, you might also enjoy this easy guide to Compost Tea Recipes, perfect for pairing with your homemade leaf mold.
Understanding Composting and Leaf Mold
Digging into how to make leaf mold means you’ll also learn the basics of composting.
Let’s clear up what composting is, explore the main types of composting methods, and discover why leaf mold stands in a league of its own when it comes to soil health.
Whether you’re just getting started or want to boost your current compost pile, this section will highlight simple ways to get quality results.
Composting Basics for Beginners
Composting is, at its core, a way to recycle nature’s leftovers—turning kitchen scraps, grass clippings, and garden waste into a nutrient-rich material called compost.
This process doesn’t just shrink your rubbish pile; it breathes new life into tired soil and gives your plants a gentle natural boost.
When it comes to composting, there are a few main methods:
- Traditional Compost Pile or Bin: Stack up kitchen scraps (fruit peels, veggie bits), yard clippings, and dry leaves in a pile or bin. Nature handles the rest, slowly turning it all into rich, earthy compost. Best for anyone with a little space and patience!
- Vermicomposting: Fancy a bin full of hardworking worms? This method uses red wigglers to munch through food scraps, quickly breaking them down into castings (worm poop) that are incredible for plants. Vermicomposting shines if you want quick results and don’t have much outdoor space.
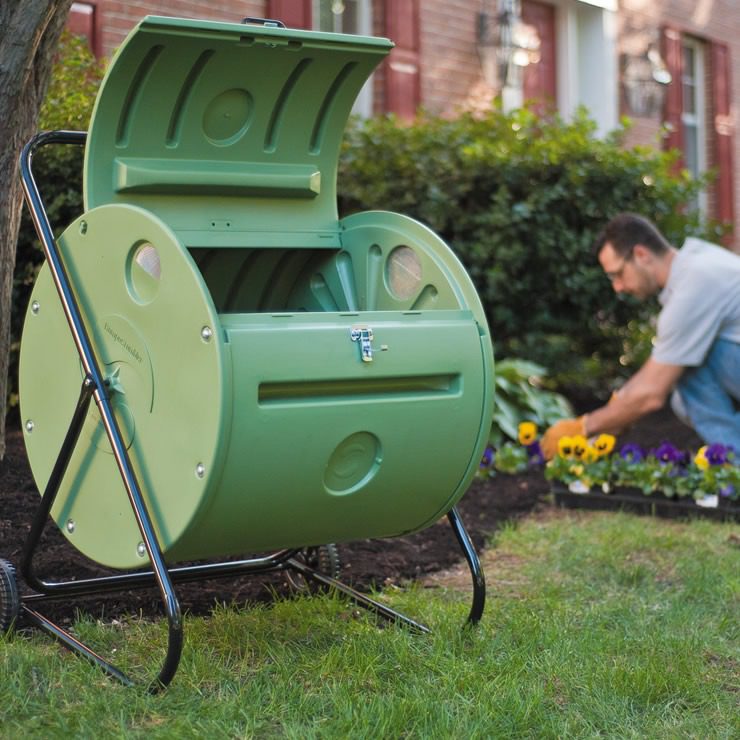
- Compost Tumbler: Imagine a barrel you spin every few days. Compost tumblers speed things up, keep mess and pests at bay, and fit neatly in small gardens or patios. They’re tidy, efficient, and make composting a breeze for busy folks.
Want to see a full list of methods? Check out the 6 Composting Methods for ideas that fit your space and style.
Each composting method has its perks:
- Use a traditional pile if you have room and like a hands-off approach.
- Try vermicomposting if you want to compost indoors or speed things up.
- Go for a compost tumbler to make composting easy, fast, and contained.
All of these methods turn waste into something useful—but the magic of leaves takes a slightly different path.
What Makes Leaf Mold Special?
 Photo by Mathias Reding
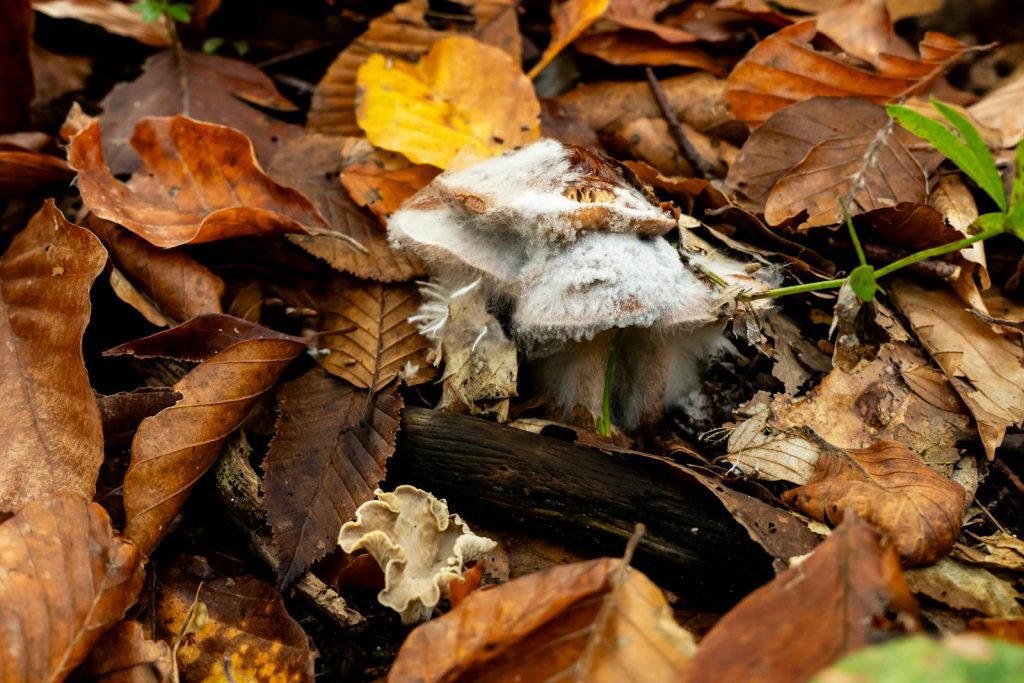
Leaf mold is what you get when fallen leaves are left to break down, just with the help of fungi and moisture—no kitchen scraps or worm bins required.
This process is simple and needs two things: leaves and patience.
Over months (or up to two years, if you’re in no rush!), a pile of leaves changes into a soft, crumbly, dark material that looks and smells a lot like a forest floor.
Why do gardeners rave about leaf mold? Here’s why it’s unique:
- Made only from leaves: Unlike traditional compost, leaf mold doesn’t use food scraps, which also means it’s less likely to attract pests.
- Fungal breakdown: Leaf mold forms thanks to fungi, rather than bacteria. This slower method creates a material that’s especially good at holding water in the soil—perfect for thirsty plants.
- Pure texture: Leaf mold feels rich, fluffy, and slightly damp. It looks a lot like the layer you see under trees in a woodland.
The real magic is in what leaf mold does for your garden:
- Improves soil structure, making clay soils lighter and sandy soils better at holding moisture.
- Increases water retention, so plants can go longer without getting thirsty.
- Grows healthier roots by making soil more welcoming and less compacted.
- Feeds a range of soil life, supporting worms and other garden helpers.
Leaf mold doesn’t bring as many nutrients as traditional compost, but its superpower is how it changes the very feel of the soil.
It’s like giving your garden a soft, cozy blanket.
Curious how to kickstart your own pile for incredible results? It’s as simple as stacking up autumn’s bounty and letting nature do the work.
For more ways to improve your home composting setup, the Starting Composting at Home guide is a smart next step, especially for anyone wondering how to recycle more than just leaves.
Collecting and Preparing Leaves for Leaf Mold
Let’s talk leaves—the heart of making leaf mold and a vital resource for every composter! Choosing the right leaves and preparing them well gives your garden a real head start.
You’ll notice softer, richer material and speedier results if you follow a few easy tips.
If you love recycling and want to improve your compost, vermicomposting, or even make use of a compost tumbler, understanding this step will truly pay off.
Best Leaves to Use (and What to Avoid)
 Photo by Robbi F
Not all leaves break down the same way. Some are garden gems, while others can be slow pokes or even troublemakers.
Picking the best leaves speeds up the process and creates prime leaf mold.
Top choices for how to make leaf mold:
- Oak: Breaks down slowly but makes a fluffy, water-retentive mold.
- Beech: Another favorite, crumbling into a soft, rich amendment.
- Maple: Decomposes readily and is widely available.
- Hornbeam and sycamore: Also fantastic for speedy breakdown.
- Birch and ash: Great for mixing in with “tougher” leaves.
Leaves to skip or use very sparingly:
- Walnut: Contains juglone, which can harm many plants.
- Eucalyptus: Leaves have oils that slow decomposition.
- Holly and laurel: Waxy coatings repel water and break down too slowly.
- Conifer needles (pine, spruce, fir): Very slow to rot and acidic.
- Magnolia: Tough, waxy, and stubborn!
For a handy reference and community advice on which leaves are friendly or risky, you’ll find real gardener experiences in Should I use these leaves for compost, leaf mold, or save ….
When in doubt, stick to classic deciduous trees and mix a variety for best results.
Easy Preparation and Storage Methods
Preparation can make or break your leaf mold journey. Luckily, it’s quick work with a little help from common garden tools.
Properly managed leaves break down faster and create a more even, crumbly mold.
Start with these simple steps:
- Shred your leaves: The smaller the pieces, the faster they decompose. You can use a lawn mower (just run it over a pile), garden shears, or a leaf shredder if you have one. Remember to wear gloves and goggles to keep it safe.
- Moisten as you go: Dry leaves need a good soak. A damp—not soggy—pile will attract the fungi you want for how to make leaf mold. Think of it as wringing out a sponge: moist enough to encourage decay, but not dripping wet.
- Pile them up: Use a compost bin, an open pile, or large plastic bags with air holes poked in for ventilation. Airflow is key. If your bin is overflowing, that’s fine—leaves shrink over time.
- Time it right: Autumn is the best season to gather leaves, but late fall and early winter work, too. Align your collection with helpful guides like the Composting Calendar Tips to maximize your results.
These methods are simple, quick, and kid-friendly.
You can even teach children about composting while gathering leaves for your pile, turning a chore into an outdoor adventure.
Need more advice on how to manage your compost or mix different materials?
The resource Composting Leaves delivers extra tips on blending layers and keeping the pile moist for better, faster composting.
With the right approach, you’ll see why so many gardeners keep bags or bins full of prepared leaves ready for their composting, vermicomposting, or compost tumbler setups.
Your future garden soil will thank you!
How to Make Leaf Mold: Step-by-Step Guide
Ready to transform piles of ordinary leaves into a garden powerhouse?
Making leaf mold is simple and rewarding. You don’t need fancy tools—just a bit of patience and the right spot in your yard.
Here’s a step-by-step guide explaining classic to quick methods, with easy troubleshooting for a stress-free process.
The Classic Leaf Pile Method
 Photo by Magda Ehlers
The absolute easiest way to make leaf mold is the traditional leaf pile.
Just gather your raked leaves into a loose mound in a shaded, out-of-the-way spot in your garden or yard.
Where grass struggles, leaf piles thrive—shady corners are ideal because steady moisture helps cleanup crews like fungi do their best work.
Here’s how to do it:
- Pick a level, shaded, and sheltered area. No need for sun—fungi love the shade.
- Pile leaves knee-high or more. The more, the better. Over time, they’ll shrink a lot.
- Water your pile lightly if it feels dry. Dampness is key; think of a squeezed-out sponge.
What to expect? Nature works at its own pace. Leaf mold takes anywhere from 6 months (for partially broken-down, usable mulch) up to two years for the finest, crumbly “black gold.”
You don’t need to turn the pile, but giving it a poke or stir every month speeds things up.
Occasional care:
- Add more leaves as they fall.
- Water during dry spells.
- Fork over (mix) the pile a couple of times per year if you’re able.
Don’t worry if it looks messy! This process is all about low effort for high reward.
For a real-world look at different setups and advice from other composters, check out Leaf mold – first attempt. How’s my setup?.
Speed It Up: Bins, Cages, and Compost Tumblers
You can cut your wait by keeping your leaves in a simple wire cage, wooden bin, or plastic compost tumbler.
These approaches add a bit of structure and airflow, which helps fungi break leaves down more quickly.
Bins and Cages
- Wire bins: Grab some sturdy wire mesh, make a circle about 1 metre across, and stand it up like a big basket. Fill it with shredded leaves.
- Wooden bins: Stack wooden slats or pallets to make a square “crate” for your leaves. This keeps the pile tidy and off the ground.
With a bin or cage, air moves more freely. Compression is less of an issue, so leaves decompose faster. S
prinkle with water if things get dry, and give the pile a stir now and then for even breakdown.
Compost Tumblers
If you already enjoy a compost tumbler for regular garden or kitchen waste, you’ll love how tumblers tackle leaf mold.
Toss in shredded leaves, spin every week or two, and monitor the moisture.
Tumblers keep everything contained and well-aerated, so leaf mold can be ready in under a year.
For a hands-on guide, read the how to use a compost tumbler tutorial. It covers all the steps for fast composting and can be easily adapted for leaves.
If you want step-by-step visuals for various bin or cage builds, this detailed guide to making leaf mold breaks down bin and pile arrangements.
Troubleshooting and Top Tips
Sometimes, things don’t always go smoothly with leaf mold. Slow decomposition, odd smells, or curious critters can pop up.
Don’t worry—these issues rarely last when you follow a few simple steps.
Slow Breakdown
If your leaves aren’t turning into rich humus after months, try these:
- Shred leaves before piling for double the speed.
- Add a shovel of old compost or garden soil to jumpstart fungi.
- Mix up the pile with a fork or stick every few months.
Smells
Leaf mold should smell earthy, never sour or rotten. If it stinks:
- Check for excess moisture; wet piles can go anaerobic (without oxygen).
- Stir the pile and let it breathe for a few days.
- Make sure you’re using only dry leaves—not grass clippings or kitchen scraps (save those for your compost heap or Don’t Toss It Campaign guide).
Pests
Leaf piles are less likely to attract pests than regular compost. However:
- Cover with a tarp if you see lots of wildlife pawing at the pile.
- Try a wire bin with fine mesh to keep rodents out.
- Avoid adding food scraps—which are better suited for a dedicated compost pile or vermicomposting setup.
More Troubleshooting Help
- Be patient! The magic of how to make leaf mold is in the waiting. Even if things seem slow, nature knows what it’s doing.
- Check out the Don’t Toss It Compost Guide for extra troubleshooting help, especially if mixing leaves with other waste.
- For other kitchen and garden waste questions, the 6 Effective Composting Methods article can help you fix many common composting headaches.
By following these easy steps, you can count on a steady supply of beautiful, garden-boosting leaf mold. For more seasonal tips—like when to start, what leaves to use, and composting secrets—visit the Composting Calendar Tips resource for expert advice all year round.
Using Leaf Mold in Your Garden
Leaf mold is nature’s gentle soil booster.
After learning how to make leaf mold, it’s wonderful to see all the ways this crumbly, earthy material can support a thriving garden—and even houseplants.
Whether you’re new to composting or have years of experience, using finished leaf mold is a simple, effective way to build healthier soil and give your plants a natural edge.
When Is Leaf Mold Finished?
You can spot finished leaf mold with your eyes, hands, and even your nose. It should look dark brown or nearly black, soft, and fluffy—like rich woodland soil.
When you squeeze it, leaf mold holds together lightly, but then falls apart. The leaves themselves should mostly disappear, with very few big pieces left.
Take a moment to smell your finished leaf mold. It should have an earthy, fresh scent—think of a forest after rain, not anything sour or sharp.
If any leaves are still tough or it smells strange, let it mature a while longer. Patience pays off: the longer you wait, the finer and more beneficial your leaf mold becomes for garden use.
If you’re still unsure, a simple guide from Permies helps you match the texture and smell, so you’ll know it’s truly ready.
Why wait?
Because well-rotted leaf mold works magic in the soil. The process gives fungi enough time to transform every bit of leaf into a water-holding, root-friendly resource.
It even outperforms some commercial soil conditioners once it’s fully broken down.
Top Ways to Use Leaf Mold
Now you have your leaf mold. What next? Here are practical, gardener-loved ways to put it to work:
- Mulch around plants: Spread a thick layer around vegetables, perennials, or shrubs. This helps keep moisture in, blocks weeds, and feeds soil life. The mulch slowly breaks down, delivering benefits for months. Plus, it combines beautifully with other types of compost or mulch for maximum garden health.
- Soil conditioner: Mix leaf mold directly into garden beds, especially heavy clay or sandy soils. It acts like a natural sponge, boosting both water retention and drainage, making any patch of earth more welcoming for plant roots. This technique pairs perfectly with classic composting methods, helping you build better soil year after year.
- Potting mix ingredient: Stir leaf mold into your potting mix for outdoor containers or raised beds. It fluffs up heavy mixes and helps roots breathe. Try mixing it with garden compost, sand, or worm castings from your vermicomposting bin for a supercharged blend. Learn more tips from Treehugger’s practical uses for homemade leaf mold.
- Seed starter: For leaf mold that’s been breaking down for two years or longer, you can even use it as a gentle seed compost. Sift it first to remove any lumps or twigs—what’s left is perfect for delicate seedlings and cuttings.
These uses show how leaf mold fits right into a well-balanced garden routine. It complements compost from the heap, worm castings from vermicomposting, and the results from a compost tumbler.
For more advanced tips on combining leaf mold with other soil builders, the Composting Calendar Tips can help you use each resource at just the right time of year.
Leaf mold’s versatility makes it a favorite among both new gardeners and seasoned pros.
With every handful, you keep green waste out of landfills and turn it into something priceless for your soil’s health—an easy win for everyone who cares about composting and a thriving, sustainable garden.
Conclusion
Making leaf mold is simple, rewarding, and a little bit magical for your garden.
Turning autumn leaves into a soft, nurturing compost opens the door to better soil, thriving plants, and less waste.
Whether you enjoy classic composting, vermicomposting, or using a compost tumbler, this homemade soil booster fits right in.
By turning what would be rubbish into a powerful garden resource, you help the environment and your own backyard at the same time.
Gathering leaves and watching them transform is also just plain fun. It’s a low-fuss way to join in with nature’s own cycles.
Each handful of finished leaf mold you spread is proof that small, everyday choices add up to a more sustainable home and a healthier planet.
If you’re looking to build good composting habits or explore new ideas like worm bins or a dual-chamber tumbler, you’ll find more helpful steps in the How to Start Composting guide.
Thanks for reading!
Try out a leaf mold pile yourself and share your progress. Every effort counts, and your garden—and the earth—will thank you for it.
FAQ: How to Make Leaf Mold
How long does it take to make leaf mold?
Leaf mold needs patience. Partially finished leaf mold can be ready in 6-12 months for mulching, but for the softest, richest form, leave the pile for up to two years.
Shredding leaves or keeping the pile moist can help speed up the process.
What’s the difference between compost and leaf mold?
Compost (from composting or vermicomposting) is usually made with kitchen scraps and green waste, broken down mostly by bacteria.
It’s packed with nutrients for plants. Leaf mold comes from just leaves, decomposed mainly by fungi. It doesn’t feed plants as much but greatly improves soil structure and water retention.
Can I add food scraps to my leaf mold pile?
It’s best to keep your leaf mold pile to just leaves. Adding food scraps may attract pests and change how it breaks down.
If you want to recycle kitchen waste, set up a separate bin or try out tips from the Don’t Toss It Campaign for safe and effective composting.
What should I do if my leaf mold isn’t breaking down?
If your pile seems slow, make sure leaves are shredded, damp (not soaking), and have enough air.
Mixing the pile and adding a little finished compost or soil can help jump-start the breakdown. More step-by-step ideas are in this BBC Guide to Leaf Mold.
Where can I learn more about composting tools or compost tumblers?
If you want to boost your composting skills or explore new gear, take a look at experiences with a Compost Tumbler for Sale.
For even more seasonal composting and garden tips, check out Composting Calendar Tips.
Ready to give your soil a bit of homemade charm?
Leaf mold is just the beginning. There’s plenty more to learn about composting, vermicomposting, and creating a garden that’s both lush and sustainable.
Explore, experiment, and keep the cycle going!

