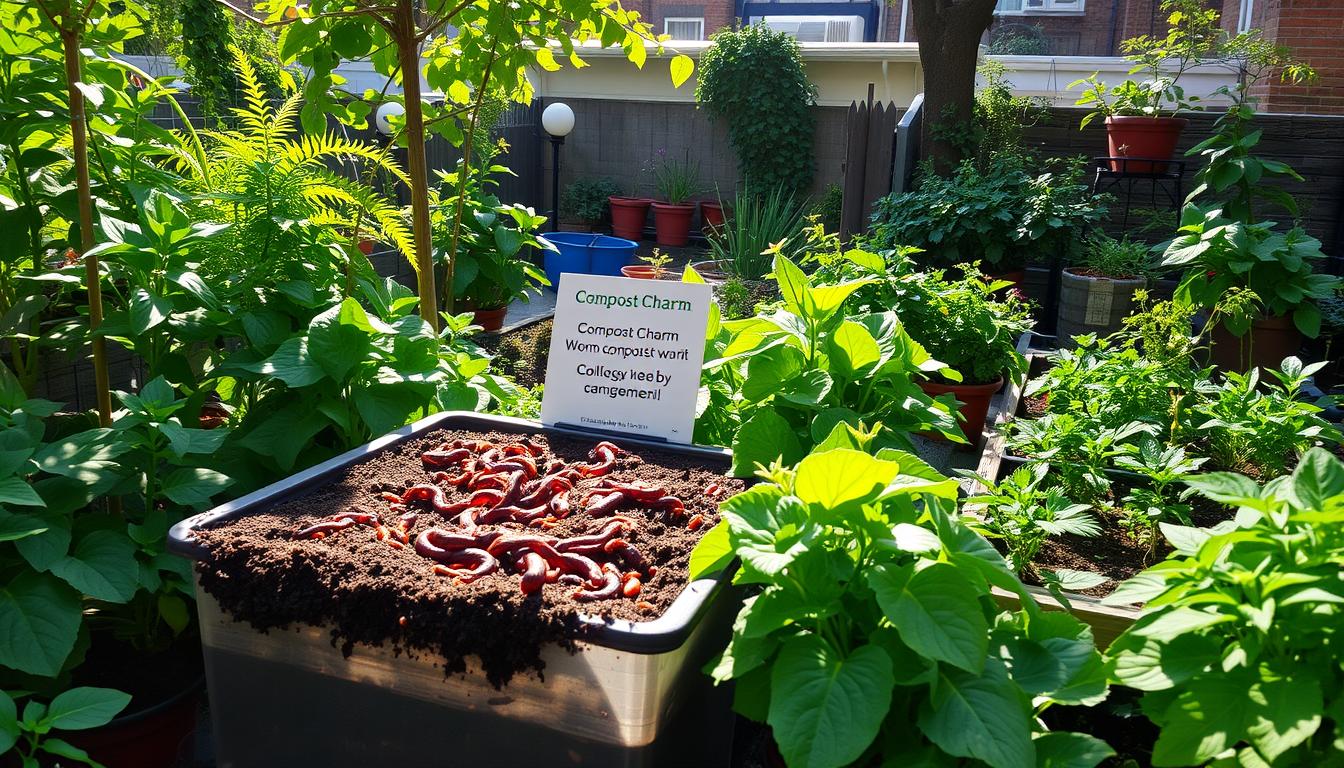
How worm composting is thriving in urban areas, turning kitchen scraps into rich soil, cutting waste, and giving small-space gardeners an easy growth boost.
You can make a big difference from your kitchen, balcony, or community lot. Vermicomposting is becoming popular in U.S. cities.
It turns food scraps into soil that’s full of nutrients, using very little space.
This article will show you why worm composting is good for the environment and easy to do.
Vermicomposting uses red wigglers to turn kitchen waste into vermicast. This is a soil amendment that gardeners love.
Bins are low-odor and can fit in small spaces. They can even grow from a small bin to a big community project.
This article will cover the basics, benefits, and how to start in the city. You’ll learn about bin design, maintenance, and community projects. It also talks about regulations, success stories, and how to begin today.
It uses information from experts and studies to explain how vermicomposting works.
I want to make this topic easy to understand. You’ll get tips, solutions to problems, and a guide to start or grow worm composting in your area.
Read on to learn how worm composting is changing urban areas and how you can be part of it.
Key Takeaways
- Urban vermicomposting makes nutrient-rich castings from everyday food scraps.
- Worm bins fit small spaces, control odors, and scale from homes to community sites.
- Red wigglers (Eisenia fetida) drive a cold composting process with high microbial value.
- Adopting worm composting helps divert food waste and cut landfill methane.
- The article maps practical methods, design tips, community models, and starter steps.
How worm composting is thriving in urban areas
In U.S. cities, people, schools, and small businesses are turning food waste into soil. More and more, apartments, community gardens, and cafes are getting involved.
Home bins and drop-off co-ops help reach more people than just one household.
Compact gear, like Rubbermaid totes and the Urban Worm Bag, makes it easy to compost in cities. People can fit bins under sinks, in closets, or on balconies.
Community bins handle larger amounts from markets, restaurants, and schools.
Vermicomposting fits well with city living. It takes up little space. When bins are well-maintained, they don’t smell bad.
They can grow from one bin to a network of bins or drop-offs.
Food waste is a big problem in landfills in the United States. Worm composting helps reduce methane and saves cities money. It also makes a valuable compost for gardens and green spaces.
Cities should see vermicomposting as a key tool. It helps reduce landfill waste, supports local food, and creates jobs.
Investing in training and sites can make a big difference. Strong policies and outreach can grow small efforts into citywide successes.
Benefits of urban worm composting for sustainable waste management
Worm composting turns kitchen scraps into something useful. In cities, it helps manage organic waste better. It keeps food waste out of landfills and reduces methane emissions.
This method makes vermicast, a nutrient-rich soil amendment. Vermicast adds nutrients like nitrogen and phosphorus to soil. Gardeners use it to improve plant health and retain water.
Vermicomposting helps small growers and city programs. Community gardens and school plots get organic matter.
This saves money on fertilizers and builds soil resilience.
There are big environmental benefits. It reduces greenhouse gas emissions and supports waste reduction goals.
Studies show that food waste makes up a lot of landfill content. Redirecting some to worm systems cuts emissions.
Kitchen-scale vermicast offers high-value nutrients in small amounts. It has more nitrogen than some traditional composts.
Compost tea from vermicast or Bokashi leachate is great for seedlings and urban crops.
There are social and economic benefits too. Neighborhood projects teach people, save money, and build community.
They share bins and give away compost. Municipalities can use these programs to manage waste effectively.
Adopting vermicomposting helps clean streets and improve soil health. Small actions in apartments or communities lead to big gains.
They support better waste management and local food systems.
Practical vermicomposting methods that work in city settings
Worm composting is great for city living, even in small spaces. You can set it up in an apartment, on a balcony, or in a tiny yard.
Each method is easy to use, controls odors, and meets the needs of red wigglers.
Indoor worm bins
Start with a Rubbermaid tote. It’s cheap and works well. Drill holes for air and water, and keep the bedding 4–6 inches deep.
Don’t go over 12 inches to keep worms happy.
The Urban Worm Bag is a good choice for those who want something simple. It’s breathable and has a zipper for easy feeding and harvesting.
Stacking tray and tower systems
The Worm Factory 360 is a tray system. It lets worms move up to fresh food. Add trays as needed and remove finished ones for castings. It’s great for saving space and works on balconies and patios.
Stacking towers needs protection from the weather. Use a cover or place them under an eave to keep them dry. They’re perfect for small spaces.
Bokashi integration and hybrid systems
Bokashi ferments food like meat and dairy in sealed buckets. After 2–4 weeks, you can bury it or add it to a worm bin. This method is good for a wide range of waste.
Use Bokashi liquid as fertilizer for plants. Mixing Bokashi with worm composting is a smart way to handle different types of waste without odors.
Matching method to constraints
Indoor bins are best for apartments and basements. Stacking towers is great for balconies and covered spots. Bokashi is good for meat, dairy, and fatty foods.
Start small and feed lightly. Bury new food to prevent fruit flies. Keep it moist but not soggy. These tips help keep your composting odor-free and useful for gardening.
Designing a successful urban worm bin
Starting with the right bin makes worm composting easy in cities. Choose a container that fits your space and suits red wigglers.
Keep it shallow, ensure good airflow, and manage moisture for effective breakdown.
Selecting the right container, depth limits, and ventilation for red wigglers
Start with a 14-gallon opaque plastic tote, a wooden bin, or a commercial system. Make sure the lid fits well and drill vents 2–3 inches from the top.
Red wigglers prefer the surface. Keep the bin depth around 12 inches for good air. Plan for one cubic foot of space per pound of waste and worms.
For better drainage, use a two-tote setup. The bottom tote catches leachate. Add up to five small lid vents if it’s dry and protected from rain.
Bedding choices: shredded paper, coir, aged manure, and moisture targets
Good bedding includes shredded newspaper, coir, and aged manure. Start with 4–8 inches of bedding. Mix in vermicompost or aged manure to boost microbes.
Keep the bedding damp, like a wrung-out sponge. This moisture level keeps worms and microbes active.
Add dry bedding to absorb excess moisture or a bit of water to revive dry spots.
Crushed eggshells or oyster shells add grit and pH balance. Check the pH often and add shells or lime if it’s too acidic.
Feeding strategy and avoiding common problematic materials (meat, dairy, oily foods)
Feed gradually to avoid shocking the worms. Start with a quarter to half pound of food per pound of worms weekly.
Chop scraps finely and bury them in the bedding.
Avoid meat, dairy, and oily foods in small bins. Excessive citrus and raw onion can irritate systems with poor airflow.
Use Bokashi for meats or dairy before adding residues.
Add grit like crushed shells and monitor worm response. Increase feeding as the worm population grows. Pull back if odors or pests appear.
| Bin Element | Recommended Options | Why it matters |
|---|---|---|
| Container | 14-gallon plastic tote, wooden bin, stackable system, Urban Worm Bag | Size and material control light, temperature, and durability in small spaces |
| Depth | Up to 12 inches; 1 cu ft per lb of worms/food | Keeps aerobic conditions and suits surface-dwelling red wigglers |
| Ventilation | Side vents 2–3 in below lip; multiple small lid vents | Prevents anaerobic pockets and reduces odors and pests |
| Bedding | Shredded paper, coir, leaves, straw, aged horse manure | Holds moisture, supplies carbon, and supports microbes |
| Moisture target | Like a wrung-out sponge (approx. 60–85% as guidance) | Optimal for worm activity and decomposition |
| Feeding | ¼–½ lb food per lb worms/week; chop and bury | Prevents the buildup of uneaten food and keeps the population healthy |
| Avoid | Meat, dairy, oily foods, excessive citrus/onion in small bins | These materials attract pests and cause odors in tight systems |
| Amendments | Crushed eggshells/oyster shells, small inoculant of vermicompost | Supplies grit, buffers pH, and speeds microbial establishment |
Maintenance best practices for thriving urban vermicomposting
Keeping a worm bin healthy in a small space starts with simple care. A routine that balances feeding, bedding, and checks prevents problems.
These habits show the benefits of vermicomposting in urban areas, like lower odor and steady compost.
Start by checking your worm bin regularly. Check temperature, moisture, and pH once a week. Keep the bin between 55°F and 77°F for red wigglers.
Place it in a steady indoor spot to avoid temperature changes.
Moisture should feel like a wrung-out sponge. Bedding moisture should be around 75–85% for active systems. If it’s too dry, add water slowly.
If it’s too wet, add shredded paper or cardboard.
Worms like slightly acidic conditions, near pH 5.5. Avoid too much acidity from fruit. Use crushed eggshells, garden lime, or rock dust to adjust pH if needed.
Harvesting worm castings is best every 3–6 months. Use stacking trays or the migration method. Add fresh bedding and food in a new tray to lure worms upward, then remove the finished material below.
A healthy bin has visible cocoons, steady reproduction, and worms spread through the bedding. A mild earthy smell and diverse microfauna show balance.
Fast reproduction signals strong growth.
Troubleshoot early. If food stays untouched for 2–3 weeks, cut back feedings. Foul odors mean soggy, anaerobic bedding; remove wet material and add dry bedding.
Practice benign-neglect strategies when possible. Resist constant probing to avoid stressing worms. Feed every few days instead of daily.
Add bedding occasionally to maintain aeration.
Address overcrowding, extreme heat, or dryness quickly. Move the bin to a cooler spot, add damp bedding, or split the population into a second container.
These actions protect worm health and preserve the long-term goals of vermicomposting.
Keep records of your checks and small adjustments for a month. This data makes monitoring worm bin trends easy.
It helps you fine-tune feeding schedules, harvest timing, and simple practices for the best vermicomposting benefits.
Community composting and city-scale worm projects

Community programs make a big difference. They help when people don’t have space. Drop-off sites and compost co-ops are places to bring food scraps.
How community drop-off sites and compost co-ops expand access
Places like community gardens and schoolyards accept food scraps. They have rules for what can be brought. Volunteers help keep things running smoothly.
Partnership models with cafes, restaurants, and local businesses for feedstock
Local businesses give a lot of food scraps. They can have special bins or pickups. This helps keep the composting process clean and steady.
Benefits to public green spaces, community gardens, and municipal waste goals
Compost helps soil in parks and gardens. It also saves money for cities. Tracking how much waste is diverted helps show success.
Teaching people about composting helps too. Workshops and school programs spread the word. This makes programs stronger and more welcoming.
Keeping things simple helps a lot. Have clear rules, schedules, and ways to track progress. This makes big projects work well.
Regulations, space constraints, and legal considerations in urban areas
Before starting a worm bin or compost drop-off, check local rules. City and county laws can affect where bins go, what you can compost, and if you need permits.
Contact your waste department or extension office to avoid fines.
Checking local ordinances and permitting for residential and community composting
First, read your city or county code. Some areas let you compost at home or indoors without a permit. Others need registration for community sites or ban outdoor piles.
Talking to the waste management office helps clear up any confusion.
Addressing neighbor concerns: odor control, pest prevention, and communication
Neighbors might worry about smells and pests. Keep a 3:1 brown-to-green ratio, aerate bedding, and bury food scraps to prevent odors.
Avoid meat and dairy in outdoor systems to reduce pests.
Use secure lids and place bins on concrete or raised platforms. For extra protection, choose rodent-proof containers or site bins under eaves.
Offer finished compost to neighbors and explain how to care for it to build trust.
Maximizing limited space: vertical systems, under-sink setups, and balcony solutions
Space-saving designs let you compost in small homes. Vertical towers and tray systems fit balconies and patios. Under-sink worm bins keep indoor scraps hidden and odor-controlled.
Bokashi buckets are great for small kitchens by fermenting food before adding it to a worm system. Larger systems can handle mistakes but need more space.
Smaller systems require closer attention to moisture and acidity.
By knowing urban composting regulations and using smart designs, your project helps manage urban waste. It also promotes composting in cities and makes the most of limited space.
Success stories and emerging urban composting trends in the United States

In U.S. cities, small actions are leading to big wins. Neighborhood gardens have bins that turn food waste into soil. Schools teach kids how worms make nutrient-rich compost.
Small businesses sell this compost to nurseries and markets. This supports green farming in cities.
Boston and Portland have grown their composting networks. They started with just a few bins. Now, they have many drop-off sites and co-ops.
Local cafes and gardens work together.
They send food waste to gardens. This shows how composting can grow in cities.
Guides and reports show the impact. A 14-gallon bin can handle two pounds of waste weekly. For many homes, this adds up a lot.
Worm composting is slower but offers great benefits. It’s perfect for city gardens.
Now, people use Bokashi and worms together.
It’s easier to start with products like Urban Worm Bag. Events help more people compost together.
Here’s a table comparing different levels of composting. It shows how to grow from one bin to a city program.
| Scale Level | Typical Setup | Weekly Feedstock per Unit | Likely Outcomes |
|---|---|---|---|
| Household | 14-gallon Rubbermaid or Urban Worm Bag | ~2 lbs | Reduced landfill input; castings for potted plants |
| Neighborhood Co-op | Shared bins at community garden | 20–100 lbs (multiple households) | Steady compost supply for plots; education hub |
| Commercial/Small Scale | Dedicated vermicomposter feeding local retailers | 200–1,000+ lbs | Product sold to garden centers; local circular economy |
| Municipal Integration | City drop-off plus education and business partnerships | Thousands of lbs across the program | Large waste diversion; policy support for sustainable urban agriculture practices |
How city dwellers can start and scale worm composting at home
Worm composting is perfect for city living. You can turn kitchen scraps into nutrient-rich compost in small spaces. Here are steps and tips to start and grow a worm composting system at home.
Starter essentials and a compact checklist
Start with a simple checklist for your worm bin. A 14‑gallon Rubbermaid tote or Urban Worm Bag is great for small spaces.
Use 4–8 inches of damp bedding like shredded newspaper or aged horse manure. Add crushed eggshells for grit and a small fork for turning.
Get red wigglers (Eisenia fetida) from a trusted source. Keep a moisture and temperature guide handy. These steps make worm composting easy and predictable for city dwellers.
Inoculation, waiting, and first feedings
Start microbes by adding vermicompost or aged horse manure to the bedding. If you can’t find these, use a small amount of garden soil or composted leaves.
Prepare the bedding before adding worms. Let microbes work before adding worms. Open the lid slightly the first night to help worms burrow.
Wait a week before adding more food.
Start with small amounts of food. Feed 1/4–1/2 lb of food per lb of worms per week. Place food in pockets or thin layers.
Avoid meats, dairy, and oily foods. Stop feeding if food is untouched.
Monitoring health and scaling up
Check the bin daily at first, then weekly. Keep it at 55–77°F and moist like a wrung-out sponge. Aim for slightly acidic pH and watch for cocoons and reproduction.
Expand when worms reproduce fast and eat more than you feed. Add another tray, more bedding, or worms. You can also join local programs or donate castings to gardens.
Consider brands like Urban Worm Bag and Worm Factory 360 for scaling.
Order worms from trusted vendors or follow local advice for healthy worms.
| Step | What to use | Why it matters |
|---|---|---|
| Bin | 14‑gallon Rubbermaid or Urban Worm Bag | Compact size fits apartments and balances moisture and airflow |
| Bedding | Shredded newspaper, coir, or aged horse manure (4–8 in) | Holds moisture, provides habitat, and supports microbes |
| Microbial starter | Small amount of vermicompost, garden soil, or alfalfa | Speeds decomposition and stabilizes the system |
| Worms | Red wigglers (Eisenia fetida) from reputable suppliers | Efficient surface feeders, suited to bins and trays |
| Feeding | Chopped kitchen scraps, avoid meat/dairy, feed in pockets | Prevents odors and overfeeding while matching worm consumption |
| Monitoring | Thermometer, squeeze test for moisture, weekly checks | Maintains health and signals when to expand |
| Scaling | Extra trays, more worms, community drop‑offs | Grows capacity for food waste and spreads urban vermicomposting benefits |
Conclusion
Worm composting is a smart choice for city living. It’s practical, scalable, and good for the planet. In U.S. neighborhoods, small systems like Urban Worm Bags or stacking trays are making a big difference.
They turn food waste into valuable compost for gardens and community plots.
Starting small is key. Pick a container, add bedding, and introduce worms. Let microbes and worms work their magic. Keep an eye on moisture and temperature, feed wisely, and be patient.
Following these steps will help your bin thrive and support local food efforts.
But it’s not just about homes. City-wide composting programs can make a huge impact. With shared drop-off sites, cafe partnerships, and municipal support, we can reduce waste and improve soil.
Local services and compost programs can help you get started and grow your system.
Begin with a small setup, learn its needs, and connect with others. By doing so, you join a movement that’s making cities greener and healthier.
Worm composting is proving to be a powerful tool for urban sustainability.