Wondering what is a good DIY compost bin? Learn simple builds, airflow tips, and budget materials.
Start clean compost fast, even in small spaces.
A good DIY compost bin should be easy to use, affordable, and take up little space.
It needs to let air in, drain water, keep warm, and be easy to get into. This way, kitchen scraps and yard waste can turn into nutrient-rich compost.
Composting mixes green materials like fruit and vegetable scraps with brown materials like leaves and cardboard.
This mix creates a soil amendment that’s full of nutrients.
This guide will show you how to make a compost bin that fits your needs. You’ll learn about different materials like pallets, wire, plastic, and barrels.
We’ll also cover simple designs for small spaces, like a five-gallon bucket worm bin or a plastic tote.
We’ll talk about design options, from tumblers to three-bin systems. You’ll get step-by-step construction tips, advice on what to compost and what to avoid, and how to maintain and fix your bin.
Plus, we’ll share ways to upgrade your bin without spending a lot.
Composting times vary. Hot composting can take 1–3 months with regular turning.
Cold composting is slower but requires less effort. Vermicomposting and indoor methods are great for small spaces like apartments or balconies.
Many DIY compost bins are cheap and easy to make. A trash-can or tote composter can be set up in under an hour.
A $5 worm bin using two 5-gallon buckets is a good option for indoor composting.
More permanent bins made from pallets or wood can speed up composting in bigger gardens.
Keep reading to find out if you should buy a compost bin or make your own. We’ll give you simple plans that fit your goals and space.
Our goal is to help you build your own compost bin and turn waste into valuable garden resources.
Key Takeaways
- A good compost bin balances airflow, drainage, insulation, and access.
- Hot composting is fast (1–3 months); cold composting is low-effort but slower.
- Materials range from pallets and wire to plastic totes and barrels.
- Small-space options include bucket worm bins and drilled plastic totes.
- Many homemade compost bin solutions are inexpensive and quick to set up.
What is a good DIY compost bin?
A good DIY compost bin keeps waste in one place. It helps microbes break down materials. It should also keep pests and smells away.
It should be easy to use and fit your budget and space. Think about the mix of carbon and nitrogen, moisture, and how hands-on you want to be.
Defining “good” for DIY compost bins
A good compost bin safely holds kitchen and yard waste. It supports microbes with the right oxygen and moisture.
It keeps pests out without making it hard to get to.
It should fit your needs, from small worm bins to big backyard systems.
Key performance criteria: airflow, drainage, insulation, access
Airflow is key for breaking down materials. Use slats, holes, or wire walls for air to flow. Tumblers and regular turning help move oxygen.
Drainage stops soggy, smelly conditions. Add a base with gaps or holes. For Bokashi, collect liquid in a separate container.
Insulation keeps heat in for fast breakdown. Thicker piles, insulated walls, or straw surrounds help. Smaller bins use sun and denser materials.
Easy access makes loading and harvesting simple. Look for hinged lids, removable slats, or staged systems. Quick access lowers the effort needed.
Matching bin design to your goals: fast hot compost vs low-maintenance cold compost
For fast hot compost, choose a large, insulated bin or a three-bin system. Manage layers, moisture, and turning often to keep temperatures up.
For low-maintenance cold compost, pick a wire ring, simple heap, or stationary bin. Decomposition takes longer, but you spend less time on it.
For small spaces and indoor setups, tumblers, worm bins, and Bokashi systems are great. They are compact and tidy, limiting smells and pests. Tumblers heat up quickly when turned twice a week.
Top DIY compost bin materials and why they work (pallets, wire, plastic, barrels)
Choosing the right materials for your compost bin is key. It affects how easy it is to build and how well it works.
Here are some common options, their benefits, and tips on finding and pricing them.
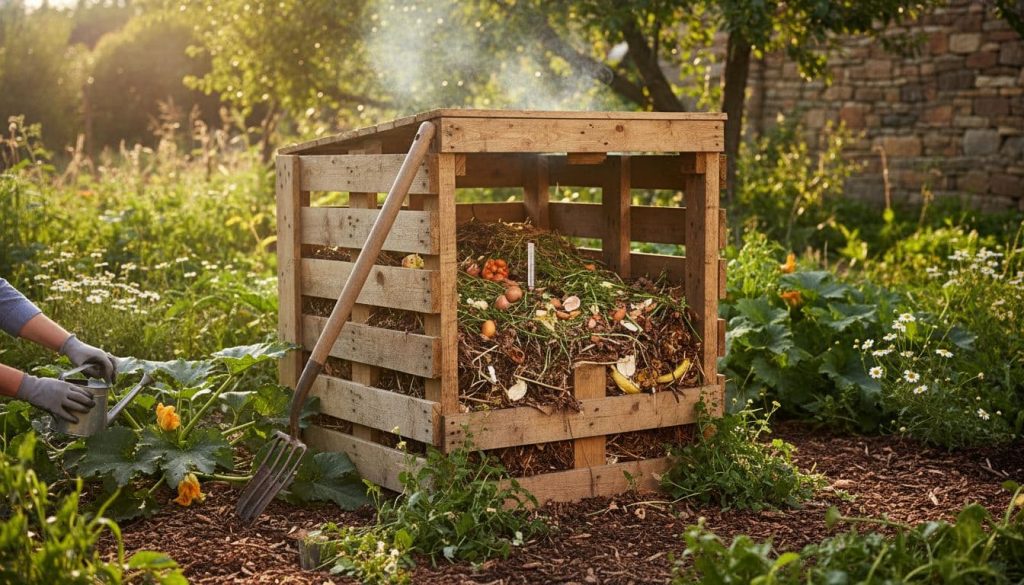
Wood pallets and lumber
Wood pallets are easy to find and cheap at places like Home Depot. They make a strong compost bin with good airflow.
You can build one bin or a system with three bins for different stages of composting.
To keep out rodents, add T-posts and hardware cloth. Lumber is pricier but lasts longer and lets you easily access the compost.
Wire fencing and chicken wire
A wire bin is simple and flexible. Use 16-gauge fencing to make round or square bins that are 48–60 inches tall.
These bins are great for fast composting because they let in lots of air.
To get your compost, just collapse or remove parts of the bin. Use hardware cloth at the bottom to stop rodents.
Plastic totes and trash cans
Plastic bins are perfect for beginners and small spaces. Drill holes for air and drainage.
Place it on coarse material or a tray to catch any leaks.
Big trash cans work the same way and can be converted in under an hour. Use double layers and hardware cloth to stop leaks and rodents.
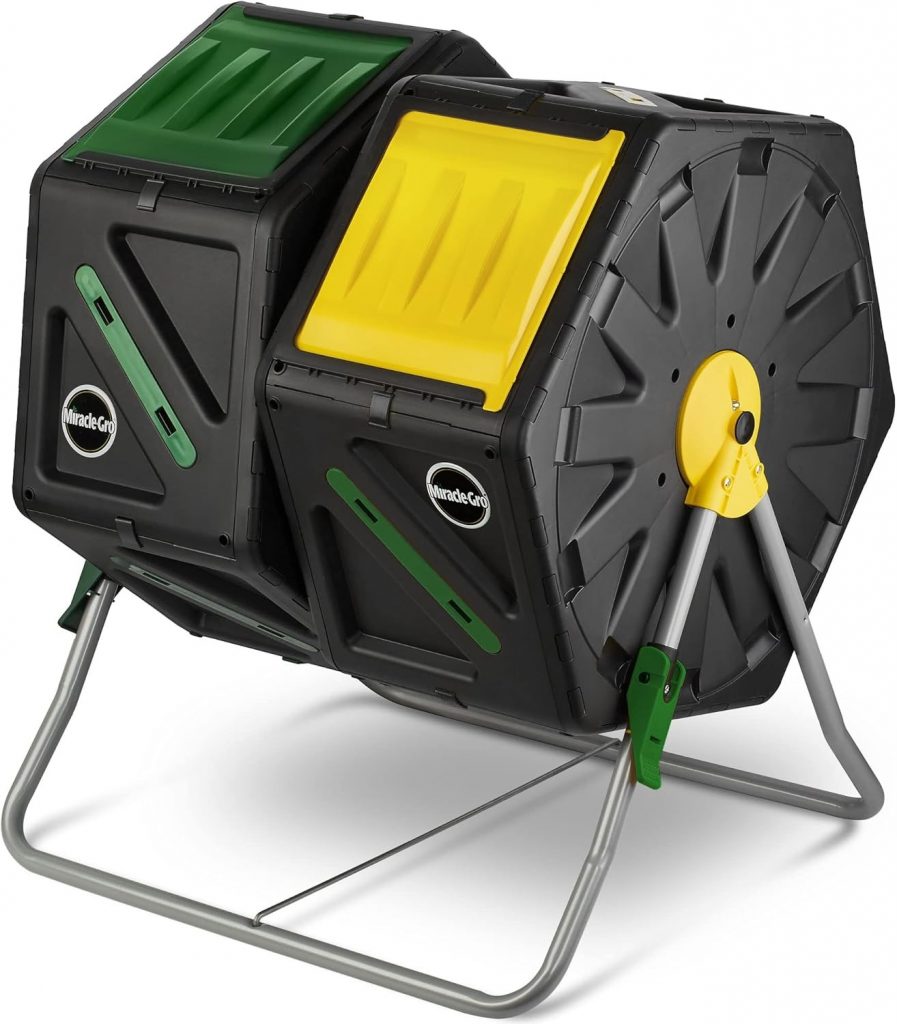
Barrels and tumblers
Compost tumblers make turning easy, speeding up the composting process. Use food-grade barrels or build a frame from sawhorses.
A sealed tumbler heats up faster and breaks down materials quicker.
Make sure the seals and vents are working right. Use mesh to keep out rodents.
Practical sourcing and cost notes
Many DIY projects are affordable. Trash-can and tote projects need little and cost little.
Worm bins can be made from two 5-gallon buckets for under $5. Wooden bins cost more but last longer.
Choose based on your space, budget, and how much time you have for maintenance.
Easy compost bin ideas for beginners and small spaces
Composting can be done even in small places like apartments, balconies, and tiny yards.
Choose a method that fits your schedule and comfort level. These options help reduce waste, keep odors away, and create nutrient-rich soil for plants.
Five-gallon bucket worm bin
Build a compact worm composting system with two stacked buckets. Drill holes in the top bucket for drainage.
Add shredded paper, kitchen scraps, and red wiggler worms. Place it in a cool spot and add small amounts to avoid smells.
This worm bin is perfect for tight spaces. Use food-grade buckets to save money.
With regular care, you’ll have worm castings in about six weeks.
Plastic tote compost bin
Choose a large plastic tote and drill holes for aeration and drainage.
Add a shallow pan under it to catch liquids and protect floors.
This bin is great for balcony gardeners and small yards. Layer materials, turn them, and involve kids. It’s easy to build and move.
Straw-bale enclosure and dig-and-drop methods
Make a straw bale ring for insulation and faster composting. Add kitchen scraps and garden waste inside.
This method keeps the pile warm and moist.
Dig-and-drop composting needs no special setup. Dig a trench, add compostable materials, and cover with soil.
It’s simple and works well along vegetable rows.
Indoor fermentation and alternatives
Indoor fermentation, like Bokashi, is good for limited outdoor space. Use two buckets and Bokashi inoculant to ferment waste.
Then, bury the fermented mix in soil or add it to a compost heap.
- Choose an easy compost bin that suits how much time you want to spend.
- For an effective compost bin for small spaces, focus on smell control and drainage.
- The five-gallon bucket worm bin and plastic tote compost bin are both low-cost and beginner-friendly.
- Try dig-and-drop composting or a straw-bale enclosure when tools and time are limited.
DIY compost bin design choices:
tumblers, three-bin systems, wire rings, and heaps
![]()
You have many options to turn kitchen scraps and yard waste into nutrient-rich soil.
Each design has its own trade-offs in speed, cost, and ease of use. Choose the one that suits your space, budget, and patience.
Compost tumblers are made from barrels or special rotating units on a frame.
They have sturdy handles and axle support for easy turning. Add holes for air and a drain for excess water.
Turn it every two weeks for faster composting and higher temperatures.
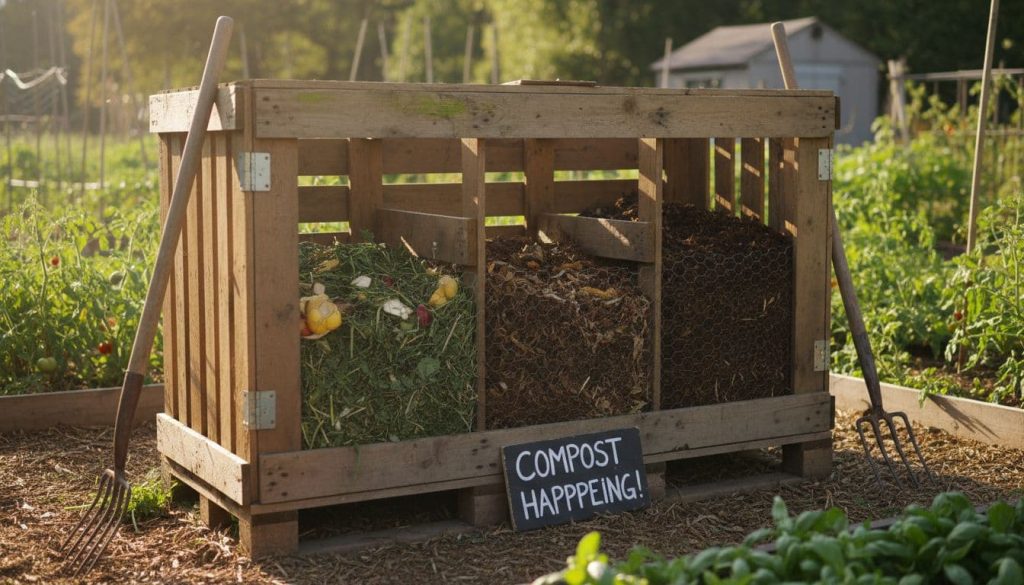
The three-bin system offers a step-by-step process: add, active, finished. You can use durable lumber or repurpose pallets and T-posts for a budget-friendly option.
It has removable parts for easy transfers and turning. This method can produce finished compost in about two to three months with regular management.
Round wire bins use galvanized fencing or chicken wire to create a circular structure. They are three to five feet wide and three to four feet tall for good airflow.
When the bottom is ready, you can unfasten or tip the bin for easy compost removal.
A simple heap requires no structure. Just pile materials on the ground in a square shape, at least 4x4x4 feet, for hot composting.
Mix woody browns, greens, and soil for quick heating.
Here’s a quick comparison to help you decide based on cost, effort, speed, and use case.
| Design | Typical Cost | Effort to Maintain | Turnaround | Best For |
|---|---|---|---|---|
| Compost tumblers | Moderate to high | Medium (regular turning) | 4–8 weeks with active use | Small yards, faster composting |
| Three-bin compost system | Moderate | Medium to high (staged turning) | 8–12 weeks with active turning | Gardeners who want staged processing |
| Round wire compost bin | Low | Low (occasional turning) | 2–6 months | Budget setups with good airflow |
| Compost heap | Very low | Low to medium (layering) | 1–6 months, depending on size | Lawn or garden areas with plenty of material |
How to build a compost bin:
step-by-step guides and practical tips
Are you ready to start? This guide will show you three ways to build a compost bin.
Choose the one that fits your needs, budget, and schedule. Each method uses simple tools and clear steps to help you work efficiently and avoid mistakes.
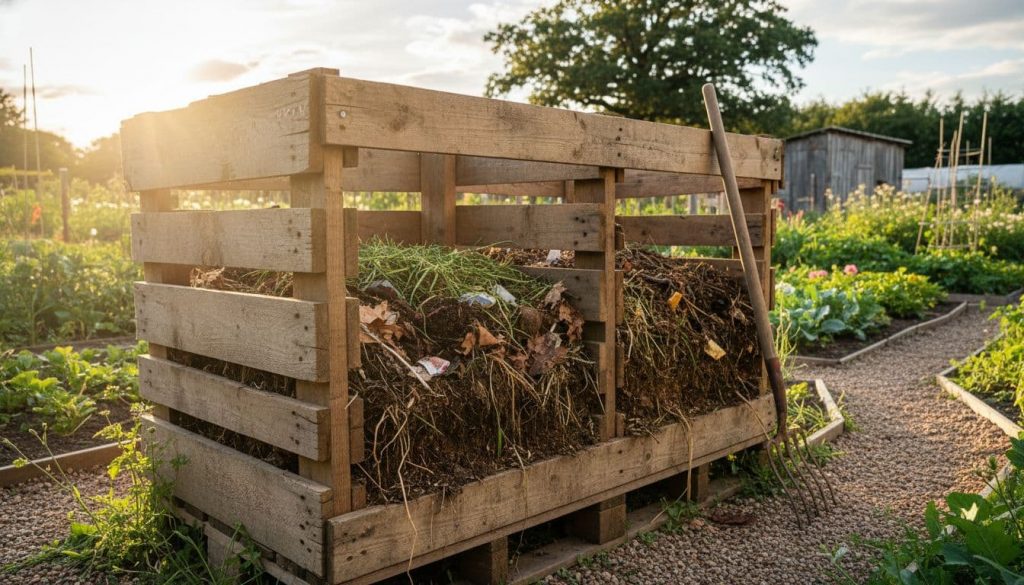
Building a pallet compost bin: tools, fastening methods, and access panels
Start by gathering three to four wood pallets from a local store or a business that gives them away.
Use a crowbar to remove any broken boards. Stand the pallets on edge to form the sides and secure the corners with treated lumber or metal T-posts for stability.
Attach hardware cloth behind the slats to keep rodents out. Use exterior screws or galvanized nails to fasten the corners.
Add a hinged top or removable front slats to reach and harvest the compost. Label the bin for staged composting if you plan multiple bays.
Making a trash can or tote composter: drilling patterns and lid modifications
Choose a sturdy plastic trash can or large tote. Mark a grid of holes about 1–2 inches apart on the sides, bottom, and lid for good aeration and drainage.
Drill holes with a spade bit or hole saw for airflow without big gaps.
For a trash can compost bin, fit a lid with a latch to deter animals. Add handles or a side grip to make turning easier.
If leachate is a concern, place the perforated inner container inside a second, solid bin to catch excess liquid.
This basic build often takes under an hour.
Constructing a DIY tumbler from a barrel: supports, handles, and sealing
Repurpose a food-safe barrel and mount it on a sturdy frame or sawhorses using a heavy-duty axle.
Position the axle to allow smooth rotation and to support the barrel when full. Cut an access hatch or fit a secure lid for loading and unloading material.
Drill ventilation holes for gas exchange while keeping the barrel sealed enough to retain heat.
Add strong handles or welded bars for safe turning. Seal seams and axle holes with rubber gaskets or silicone to block rodent entry and reduce leaks.
Quick troubleshooting tips: line openings with hardware cloth where pests might enter.
Add drainage holes and a catch tray for leachate.
For hot composting, aim for piles roughly 3 to 4 feet on each side and add a shovelful of finished compost or garden soil to inoculate microbes.
These small steps make a big difference.
Compost bin materials to include and avoid for best results
Choosing the right materials is key to successful composting. It’s important to know the difference between green and brown compost.
This helps balance moisture, heat, and microbes. Aim for a mix that composts quickly without smelling or getting soggy.
Green vs brown materials and the ideal mix
Greens add nitrogen and moisture. Examples include vegetable scraps, fruit peels, grass clippings, and coffee grounds. Browns, on the other hand, provide carbon and structure.
Good browns are straw, dry leaves, shredded cardboard, and newspaper.
For most backyard bins, use a mix of 3–4 parts brown to 1 part green by volume.
This mix supports aerobic microbes and reduces odors. When building a pile, layer two parts brown to one part green to manage moisture.
Common inclusions for healthy compost
Include coffee grounds and filters, crushed eggshells, old vegetables, fruit peels, nutshells, hay, straw, and grass clippings.
Crushed eggshells help balance acidity. Coffee grounds add nitrogen and attract worms.
Finish layers with a thin cover of soil or finished compost to inoculate microbes.
Wet newspaper strips or a bit of garden soil help worms find and colonize an outdoor compost bin.
What not to compost
Avoid meat, seafood, dairy, and greasy or oily foods. These attract pests and slow down decomposition.
Do not add pet waste or human waste; pathogens can persist.
Skip treated wood, painted lumber, and sawdust from chemically treated sources.
Avoid plants treated with persistent herbicides and any diseased or toxic plant material. Keep plastics, coated cardboard, and other non-biodegradables out of the bin.
| Category | Good Examples | Why |
|---|---|---|
| Greens | Vegetable scraps, fruit peels, coffee grounds, grass clippings | Provide nitrogen and moisture for microbes; speed decomposition |
| Browns | Dry leaves, straw, shredded cardboard, newspaper | Offer carbon and structure; prevent compaction and odors |
| Common additives | Crushed eggshells, garden soil, finished compost | Balance pH, add microbes, and improve texture |
| Do not compost | Meat, dairy, oily foods, pet waste, treated wood, persistent-herbicide plants | Attract pests, carry pathogens, or introduce chemicals that harm plants |
| Practical tip | Layer 2 parts brown to 1 part green while building the pile | Controls moisture, reduces smell, and supports steady composting |
Maintenance and troubleshooting for DIY compost bins
Keeping your DIY compost bin in good shape is key. Regular checks each week can prevent common issues.
This keeps the composting process smooth and pest-free.
Turning your compost correctly is crucial. For tumblers, aim to rotate about twice a week.
This boosts temperature and speeds up decomposition. Hot piles need turning every 3–4 days to keep the heat and air flowing.
Three-bin setups work by staged turning as bins fill. This method can show finished compost in 2–3 months.
Cold compost, on the other hand, requires little to no turning and takes much longer.
Monitoring compost moisture is vital. It should feel like a wrung-out sponge. If it’s dry, add water, or mix in greens. If it’s soggy, add brown materials and turn to restore air.
For plastic totes, ensure there’s drainage or place a catch container under the composter for any leachate.
Size and layering control heat. Build piles at least 3–4 feet in each direction for reliable hot composting. Layer woody browns, fresh greens, and a thin soil layer to introduce microbes.
Insulate with straw bales or place the bin in sun to retain warmth and speed decomposition.
Pest prevention is simple. Seal lids, use hardware cloth on openings, and avoid adding meat, dairy, or oily foods.
Cover fresh food scraps with brown material each time you add them.
For trash cans, totes, or barrels, drill smaller holes and line openings with wire mesh when rodents are a concern.
Common compost troubleshooting is usually simple. A foul odor often means too wet or too many greens; add browns and turn the pile.
Slow breakdown can come from dryness, a pile that’s too small, or low nitrogen; add water, more greens, or mix the pile to increase contact between materials.
If pests arrive, remove attractants and secure the container with lids or wire.
| Issue | Likely Cause | Quick Fix |
|---|---|---|
| Bad smell | Too wet or too much green material | Add dry brown materials, turn compost, and improve drainage |
| Pile cools or slows down | Pile too small, too dry, or low nitrogen | Increase pile size, add water and greens, mix layers |
| Fruit flies or small insects | Exposed food scraps, light cover | Cover scraps with browns, use a tight lid, and bury fresh greens |
| Rodent visits | Open access, large holes, meat/dairy present | Install hardware cloth, seal lids, avoid meat and dairy |
| Excess leachate | Poor drainage in totes or bins | Improve drainage, use a catch container, add absorbent browns |
Affordable and creative compost bin solutions and upgrades

You don’t have to spend a lot to make a good composter. Use things you already have to build a cheap compost bin.
This way, you save money and reduce waste. You also get to control how well it breathes, drains, and how easy it is to get to.
Dresser drawers are great for small spaces, like indoors or garages. Just add a hinged lid and some holes for drainage.
Old barrels can be turned into tumblers with a simple axle and handles. Pallets can be used to make a three-bin station for better composting.
Plastic storage bins and trash cans are perfect for balconies or apartments. Each of these ideas offers a good mix of cost, effort, and upkeep.
Cheap insulation and aeration upgrades
Use straw bales to keep your bin warm in cold weather. Make holes or slots for better airflow to cut down on bad smells.
Cover openings with hardware cloth to keep out rodents but let in air. Dry leaves or straw help soak up moisture and keep the compost active.
These upgrades are cheap and use recycled materials.
DIY compost screen and sifter plans
Make a hand sifter from a simple frame and hardware cloth. Place it over a bucket and shake to separate compost.
Put the bigger pieces back in the bin to break down more. A DIY screen makes your compost better and faster.
- Worm bin from a five-gallon bucket: under $5 and ready in 30 minutes.
- Tote or trash-can composter: drills and vents make a fast, small-space option.
- Barrel tumbler from a reclaimed drum: more build time, low material cost.
- Pallet three-bin: takes a few hours and yields staged compost for continuous use.
Small changes can make a big difference. A repurposed bin with better ventilation and a sifter makes composting easier.
These creative solutions help you meet your goals while keeping your yard neat and productive.
Choosing the best compost bin for your needs: comparison and decision guide
Finding the right compost system can be tough. This guide helps you understand the key points.
It’s a tool to help you pick the best compost bin for your home, balcony, or garden.
Checklist
- Space: balcony, small yard, or full backyard.
- Budget: free pallets or a purchased tumbler like the NatureMill.
- Desired speed: hot compost needs larger mass; cold compost is slower.
- Maintenance: frequent turning for fast results or low-touch systems.
- Pest risk: urban rodents favor enclosed bins and hardware cloth.
- Indoor needs: vermicompost or Bokashi for kitchen scraps.
Which is the best compost bin for beginners?
For many, a trash-can composter or a plastic tote with holes is best. These are cheap, easy to manage, and forgiving.
Wire-ring bins are good for simple airflow and quick setup. If you live in an apartment, a worm bin is great for indoor composting and makes excellent castings.
Which performs best for hot composting?
For high temperatures, you need mass and structure. A three-bin turning unit from pallets or lumber is ideal.
It has room for staged piles and steady heat. Heaps of at least 4x4x4 feet warm up fast and break down in weeks.
Tumblers mix well but might lack the capacity for true hot composting.
Small-space and indoor options versus backyard setups
For small spaces, vermicomposting buckets, Bokashi kits, and compact totes are good. They handle kitchen scraps with little odor.
But, they have limited volume and need more emptying.
Backyard setups like pallet three-bin systems, wooden bins, tumblers, and hoop-wire rings offer more capacity.
They make hot compost and staging easier. But, they take up more space and require more effort to build.
Practical approach
Use a mix of methods to fit your life. Use an indoor Bokashi bucket for wet kitchen waste and send yard trimmings to an outdoor pile.
This way, you reduce trips to the compost area and speed up decomposition.
| Option | Best for | Pros | Cons |
|---|---|---|---|
| Plastic tote with holes | Beginners, balconies | Cheap, lightweight, easy setup | Small capacity, needs frequent monitoring |
| Trash-can composter | Beginners, small yards | Affordable, weatherproof, simple | Moderate capacity, manual turning |
| Worm bin (vermicompost) | Indoor users, high-quality castings | Low odor, fast kitchen waste processing | Limited volume, temperature-sensitive |
| Three-bin pallet system | Hot composters, gardeners | Large capacity, staged curing, inexpensive if using pallets | Requires space and building effort |
| Tumbler | Fast mixing, moderate yards | Easy turning, enclosed to deter pests | Limited volume, can dry out fast |
| Hoop-wire or ring bin | Simple backyard composting | Quick setup, good airflow, inexpensive | Less rodent protection needs more attention |
This guide aims to make choosing compost bins easier. Use the checklist and table to find the perfect fit for your needs and space.
Available at our Apparel Store, Compost Charm Clothing

Conclusion
When picking a DIY compost bin, look for five key things: airflow, drainage, insulation, easy access, and a good fit for your space and goals.
You can find affordable options like trash cans, plastic totes, and more. Each one meets different needs in unique ways.
Think about how much time you have and how fast you want compost. For small spaces or beginners, a simple bin like a drilled tote works great.
For bigger needs, a three-bin system or a tumbler from a barrel is better.
The article on building a compost bin offers detailed steps for each option.
Make composting easy: aim for a 3–4:1 brown-to-green mix and keep it moist.
Turn the pile as needed, like every 3–4 days for hot piles. Avoid adding meat, dairy, or pet waste to prevent pests.
These habits make composting easy and effective.
DIY composting is both practical and rewarding.
With basic materials and a bit of effort, you can create a cost-effective, eco-friendly system.
Choose a design, follow the basics, and enjoy the benefits.